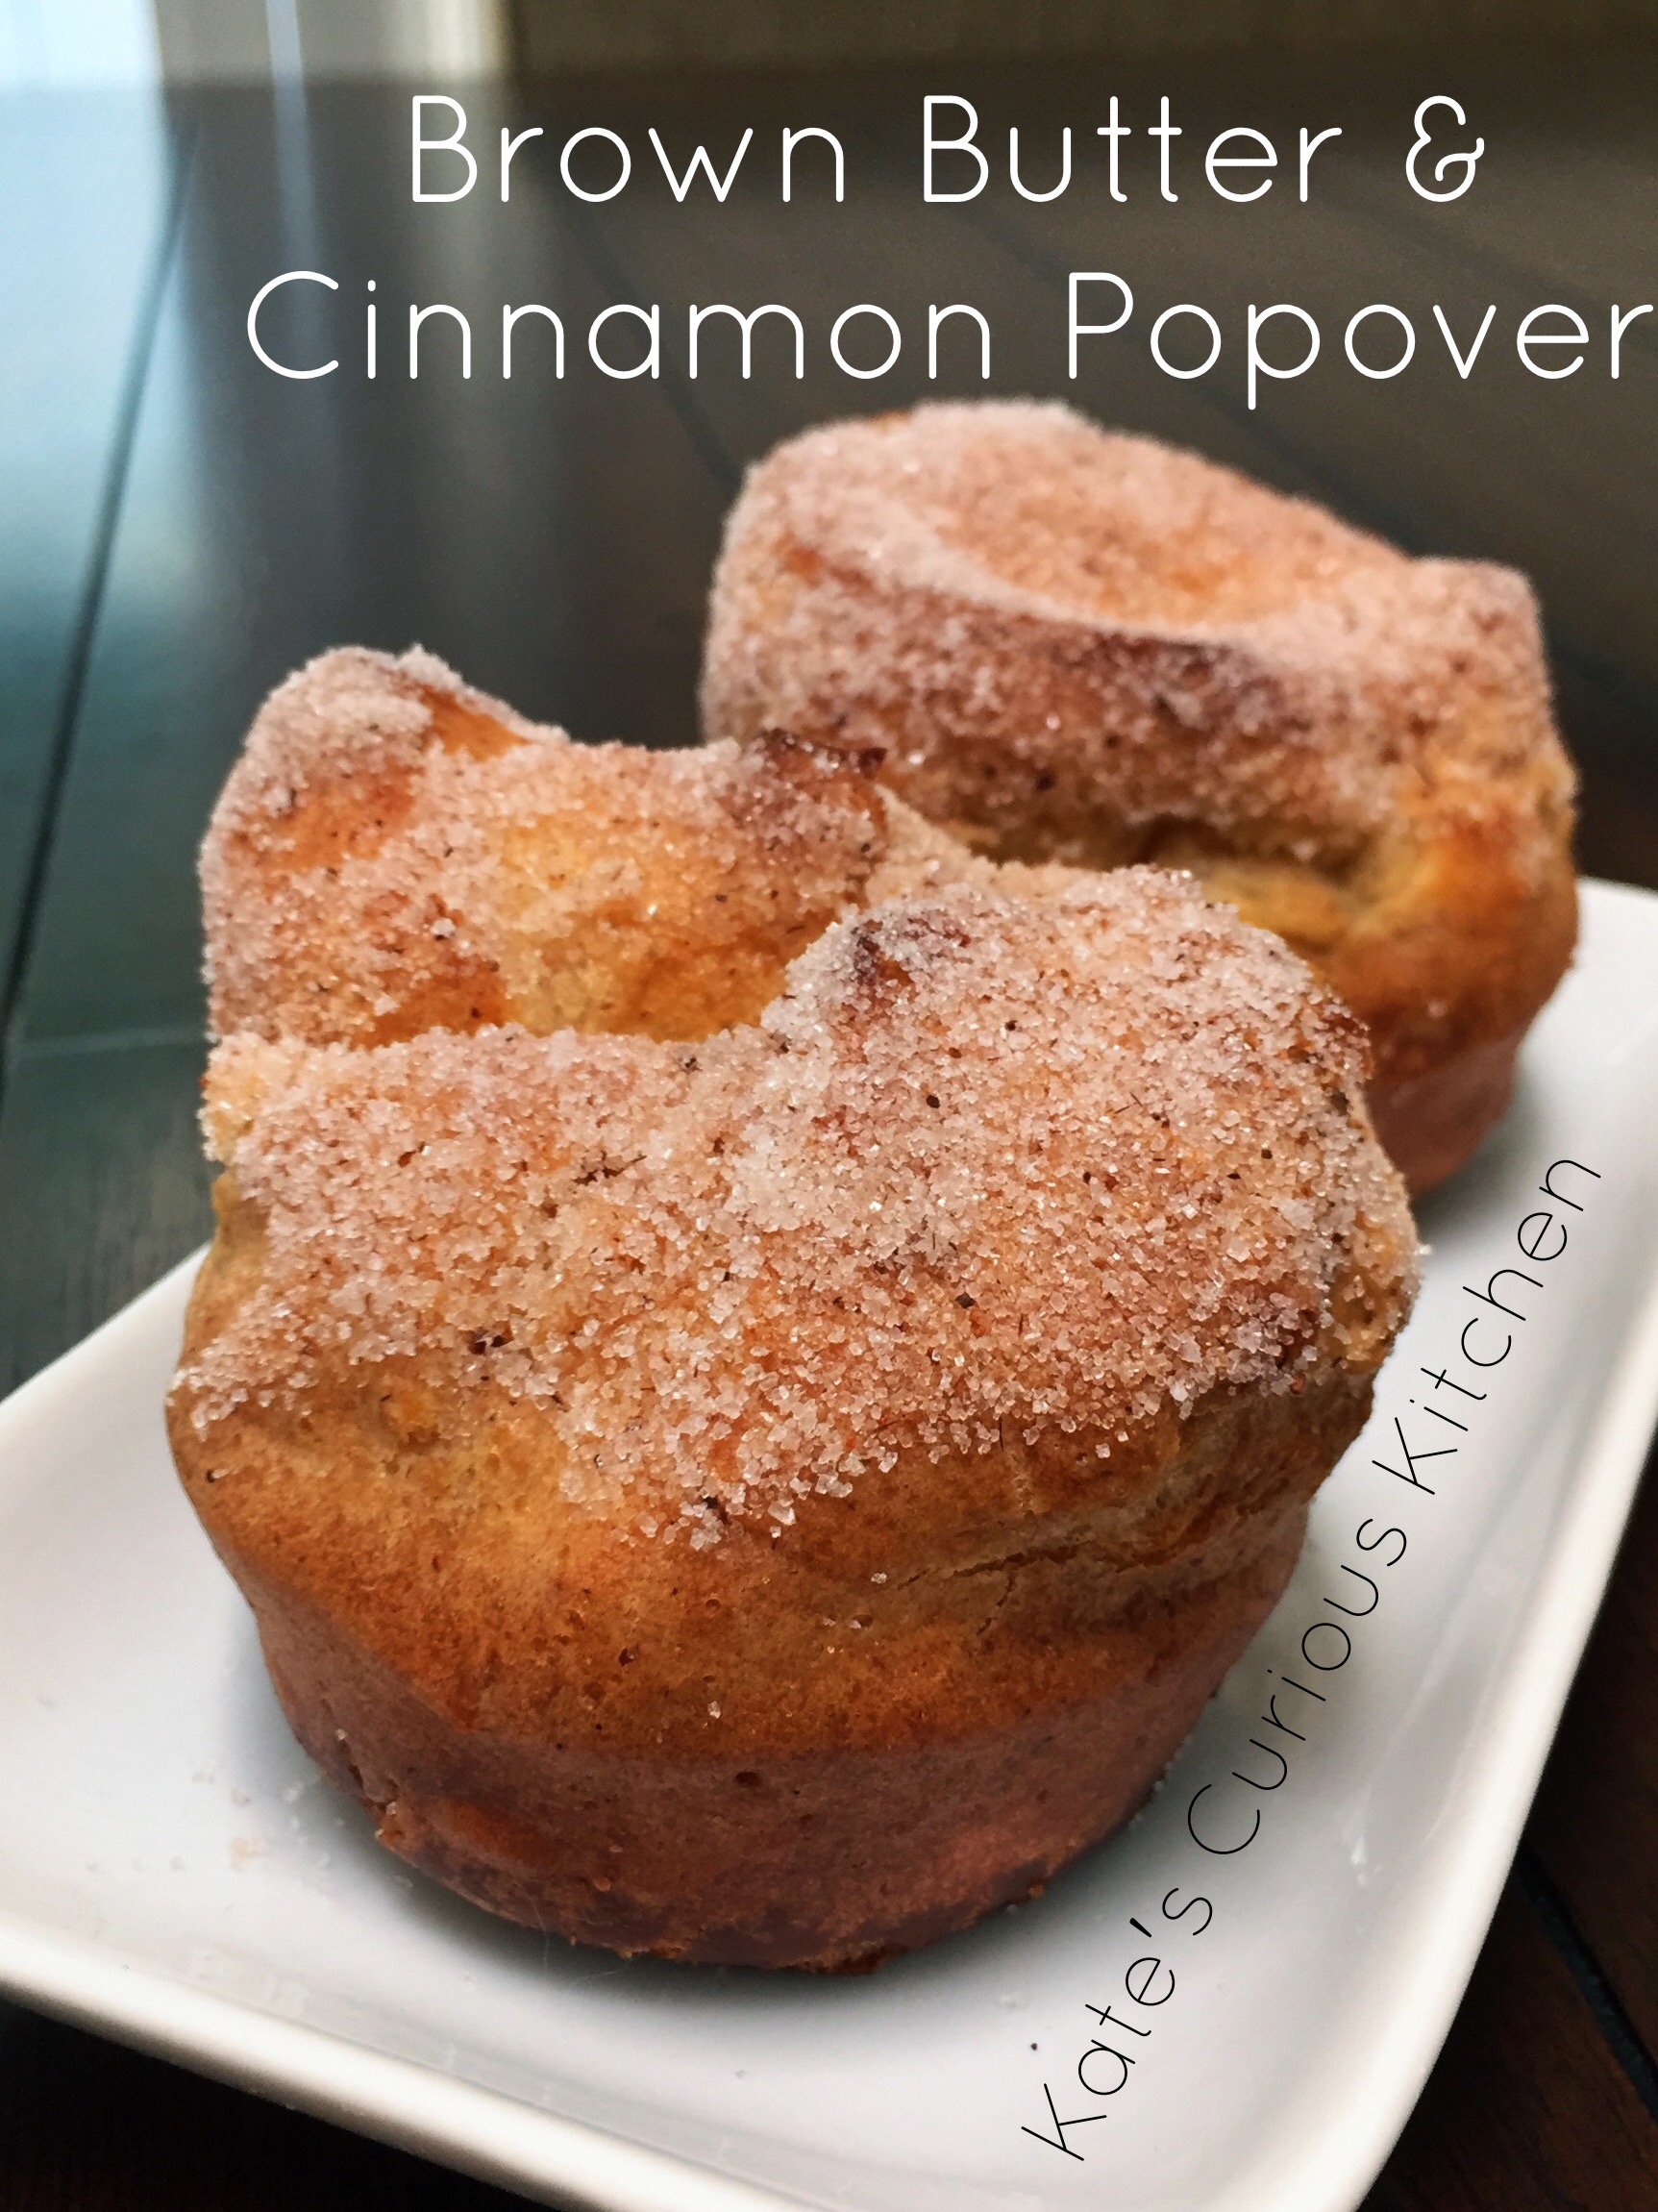
By KateLight and crispy brown butter cinnamon popovers.
Who doesn’t love a good popover? That crisp and crunchy outer shell and that soft hollow creamy center. Growing up at Christmas our meal would not be complete with out a prime rib roast and Yorkshire pudding popovers.
Recently I was looking over my enormous stack of holiday magazines trying to see what recipe needed a bit of a change, a new look and possible twist to the traditional recipe. My answer was on the page of Donna Hay’s magazine. A beautiful and crisp golden popover standing a mile high in its well used pan.
Sitting there looking at that image sipping my coffee and eating my favorite cinnamon and sugar donut that my loving husband went and bought for me that morning, the idea came like a lightening bold! Sweet cinnamon popovers, there is my twist.
Not only is this recipe easy to make, it tastes so good! The brown butter and cinnamon are so comforting, I hope you enjoy this recipe it is very simple to make and can be done in about 40 minutes, happy baking.
Brown Butter & Cinnamon Popovers
Batter
1 cup whole milk
½ cup half and half
2 whole eggs
2 Tablespoons brown butter, cooled
1 ¼ cup all purpose flour
pinch of Kosher salt
canola oil
Sugar Coating
¼ cup browned butter, warm
½ cup granulated sugar
2 teaspoons ground cinnamon
Directions
Tools; blender, immersion blender or whisk
Preheat oven to 450 degrees, place your muffin pan in the oven at this time to heat thoroughly.
Add the milk, eggs and cooled brown butter together and blend on medium speed for 30 seconds. If using a whisk mix for 1 minute. Now add the flour, cinnamon and salt. Blend for 1 minute on medium high speed or mix by hand for 3 minutes.
When your oven has come to temperature, CAREFULLY remove the hot muffin pan and add ½ Tablespoon of canola oil to each muffin well. If you have a pastry brush, CAREFULLY brush the sides of the muffin well with the oil. Now quickly mix the batter again with your whisk or blender for just a few seconds. CAREFULLY pour batter into the hot muffin pan, only filling each well ½ way full. Place the muffing pan back in the oven and set your timer for 15 minutes. DO NOT OPEN YOUR OVEN DOOR DURING THIS COOKING TIME! After 15 minutes, lower the oven temperature to 350 degrees and set your timer for 12 minutes. Once the popovers are a rich golden brown, they are finished. Remove the pan and turn out the popovers onto a cooling rack, you may have to use a knife to release them from the pan, now pierce the bottom of the popover to release the steam and set on a cooling rack.
After the popovers have cooled to where you can handle them, brush the tops with the brown and press into the cinnamon sugar.
If you would like a filling I have included my Masala Chai Applesauce recipe. Please enjoy them immediately.
Chai Spiced Apple Sauce
8 assorted apples (granny smith, honey crisp and pacific rose are my favorite)
1 cup spiced apple cider
1 Tablespoon honey, local is best
1 teaspoon vanilla, vanilla bean paste or 1 vanilla bean scraped of seeds
1- 1” piece of ginger grated or ¼ teaspoon dried ground ginger
1 teaspoon Masala Chai powder
Peel, core and rough chop the apples, set aside. In a large pot, add the cider and honey, reduce by half. Then add the apples, vanilla and masala chai powder, stir well place lid on the pot and lower heat to medium low. After 30 minutes stir well, turn off heat and mash apples with a potato masher to a chunky consistency. Let cool and keep in the fridge for up to 5 days.
October 2nd 2017 was another usual Monday grocery store day. I was driving, listening to Tom Petty Radio on Sirius XM. There’s just something about the winding roads and rolling Central Texas hills sprinkled with live oak, pecan and mesquite trees. Listening to songs like Runnin’ Down a Dream, Good to Be King, Learning to Fly, Time to Move On and my personal favorite Walls (No. 3). There it was, the breakthrough announcement of his passing. My breath quickly left me like a deflated soufflé, my heart felt like it lost a beat and my body just stopped like so many others did in that moment. I thought “this is a joke, this can’t be real, someone has made a huge mistake. Tom Petty and the Heartbreakers had just finished their 40th anniversary tour seven days ago. He was on top of his game, resting and relaxing at his home in California.”
Tom Petty 1985, photo credit Getty Images
Tears started to trickle down my face and I knew I was not the only one. There were many others in the parking lot with me, just sitting in their cars in shock. I was watching their mouths “What? Tom Petty, NO!” I could not believe the sadness that just washed over me, there was never going to be another Tom Petty or Tom Petty and the Heartbreakers new music album ever again. Just like the Traveling Wilburys, when “Lefty Wilbury”- Roy Orbison passed suddenly after a heart attack their music was never the same. The magic was gone.
That’s Tom to me, pure musical magic. Maybe because Gainesville, Florida is not too far from where my Grandfather spent time becoming a man. Working hard at learning under water plumbing and welding that one day would lead him to a career in the Navy and a Bronze Medal for his underwater demolition skills in WWII. I loved his stories about being that master plumbers apprentice the hot thick air, the Southern sound of music from the early 1930’s and how Florida was a place all on its own. But he also said once you have lived there you needed to move on from there if you wanted to become someone. Tom Petty said the same thing to Warren Zane, his friend and autobiographer many years later.
NEW YORK, NY – JUNE 09: Tom Petty speaks onstage during the Songwriters Hall Of Fame 47th Annual Induction And Awards at Marriott Marquis Hotel on June 9, 2016 in New York City. (Photo by Theo Wargo/Getty Images for Songwriters Hall Of Fame )
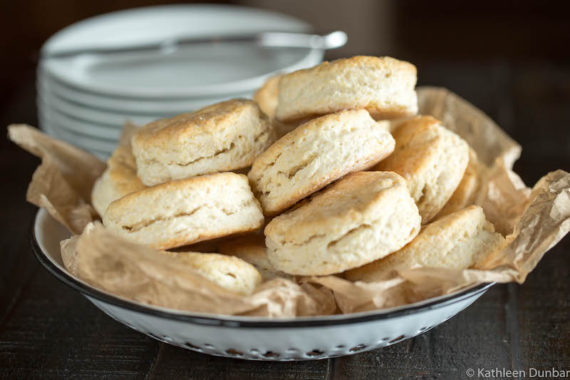
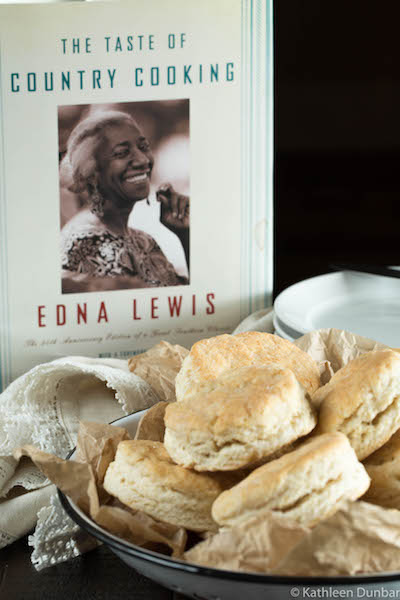
I entered the grocery store, found my cart and slowly pushed it through the aisles, not a single thing was calling to me. I had wandered to about the middle of the store then turned down an isle and there was the display of White Lily Flour. Suddenly Miss Edna Lewis and her buttermilk biscuit recipe came bursting through my sad heart. If you don’t know who Edna Lewis is, please keep reading, if by chance you do know then enjoy a brief recap of her many accomplishments. Edna Lewis, born in 1916 was the Granddaughter of a Virginia emancipated slave who helped start the community of Freetown, Virginia. She may be known to some as the African-American Chef who was graced by the USPS with her own well-deserved stamp in the Forever Stamp Culinary Professionals Issue. To others she was an award winning culinary artist, the Mother of Southern Food. In 1995 the James Beard Foundation created an award for her, the distinguished Living Legend Award.
Kitchen Aid Cookbook Hall of Fame inducted her in 2003, Les Dames d’Escoffier named her Grande Dame in 1999. She grew up cooking food, simple food, real food with layers of rich flavor and love that translated into some of this world’s best and loved comfort food recipes. She became the Chef at Café Nicholson and there she erupted the culinary world with refined Southern Cooking! Tragedy happened, Edith broke her leg and for a bit of time she was sidelined from cooking. Then a meeting happened with Judith Jones, yes that Judith Jones the one who discovered Mastering the Art of French Cooking and Julia Child. Miss Edna was encouraged to turn over her hand-written pages of stories and recipes to create The Taste of Country Cooking, which in 1976 was published by Knopf publishing house.
So many of today’s Chefs have this very book on their shelves and refer to it often. Some culinary schools require their students to read it. Don’t believe me? Go find that book at your local library or bookstore then after reading the pages and working the recipes start looking at today’s comfort food recipes. There you will see the imprint she has made on cooks and chefs for over the past 40 years. She brought pan fried chicken and its simplicity to home cooks, light and flavorful buttermilk biscuits, fresh garden preserves and hands down her corn pudding recipe is the only one you will ever need. If you search the internet, please do yourself a favor skip all the “adapted from” recipes and stick to hers, the original. They are simply the best and so is her technique in my honest opinion.
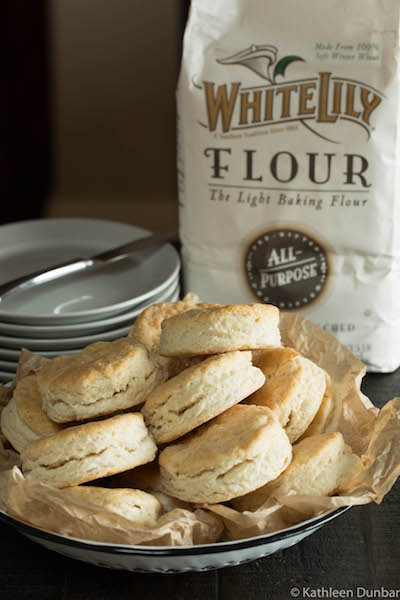
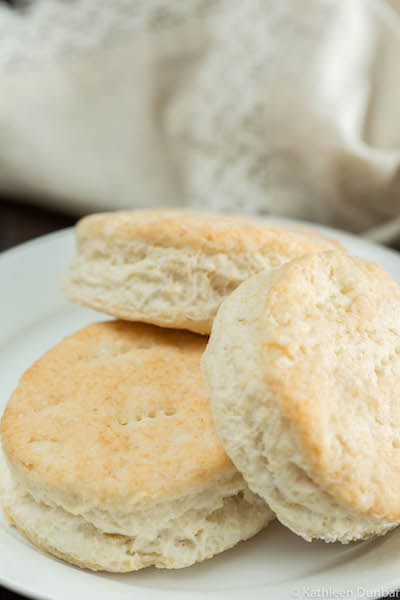
White Lily Flour has been in production since 1883 with the company tag line of “When you bake with White Lily, you’re baking with history, tradition, and love.” If you have not baked with White Lily Flour you are in for a treat, it simply creates the lightest textured baked goods because it’s a soft red winter wheat. White Lily is the Southern staple for making biscuits, pie doughs and cakes. Well there it was, buttermilk biscuits the comfort food I needed and craved. Once I was home I gathered all the simple ingredients, salt, homemade leavening (* see recipe at the bottom of this post), Tenderflake Pure Bakers lard and real buttermilk. Now this is where I am a stickler, in no way can you make buttermilk from milk and lemon juice or vinegar, that simply is soured milk and not the same. Don’t do it! The powdered buttermilk, don’t use that either it’s considered a sin for this recipe. Your oven will be set at a very high temperature, please make sure your oven is clean or the smoke alarm will go off. That intense heat will create the perfect crisp golden outer layer, there’s a slight crunch when your teeth break through that buttered top biscuit only to be rewarded with the melt in your mouth tender leaf layers of the softest biscuit you will ever make if you don’t overwork the dough. I had my ingredients, my music playlist was queued, Tom Petty of course and I knew this Southern comfort food would set my sad musical heart on the path of healing.
While the biscuits baked away in the oven I thought about all “my Tom moments,” Tom Petty was there for my first kiss, my first heart break, my first swim team win and my first solo drive after earning my driver’s license. He was there in the hospital NICU while I sang “Learning to Fly” to my little preemie twins. Tom helped me through long baking days and nights at my café, he was there with us in our car as we drove to our new home in Texas. He is there with me every time I hook up my vintage trailer and hit the open road to find my adventures. He is there with me when I cook in our new home. Tom’s there when my kids sing out of tune and help sort laundry. He will also be there again with me as I dance at my son’s wedding in a few weeks. Tom Petty will forever be a story teller to me, his song writing has truly been that famous Dick Clark quote “Music is the soundtrack of our life.” My personal soundtrack happens to have Tom Petty, Tom Petty and the Heartbreakers and Mudcrutch sprinkled through it more than any other musician I know and for that I am damn lucky and proud.
Miss Edna will be there too, to comfort my heart with her time-honored recipes, stories and accomplishments. Maybe I will share her delicious corn pudding recipe with my new neighbors, it is almost Thanksgiving time. Next year I will get over to Fredericksburg, Texas and gather a few pounds of fresh picked peaches to make her mind-blowing peach cobbler. Hopefully I have sparked an interest for you to discover her amazing talents. There is no other Chef I would be able to recommend for Southern Comfort food; Miss Edna Lewis is the Grande Dame.
Those two amazing legends have helped carve memories, traditions and launched dreams for so many. I absolutely urge you to buy these publications. The first, Petty: The Biography by Warren Zanes. The second, The Taste of Country Cooking by Edna Lewis. The third, The Gift of Southern Cooking by Edna Lewis & Scott Peacock. You will love them all, trust me.
RIP Tom Petty, you lived sir, you truly lived.
Edna Lewis’ Hot Crusty Buttermilk Biscuits
This recipe is from the book The Gift of Southern Cooking, it is simply the best and in no way, could anyone improve it. All credit goes to the Author and Creator Edna Lewis with thanks and praise!
5 cups White Lily Flour, sifted then measured
1 tablespoon plus 1/2 teaspoon baking powder, aluminum free or homemade
1 tablespoon kosher salt
1/2 cup (1/4 pound) packed lard, chilled
1¼ cups buttermilk
3 tablespoons unsalted butter, melted
Method:
Preheat oven to 450°F
Put the flour, baking powder, and salt in a mixing bowl, and whisk well to blend thoroughly. Add the lard, and, working quickly, coat it in flour and rub between your fingertips until approximately half the lard is finely blended and the other half remains in large pieces, about 1/2 inch in size. Pour in the buttermilk, and stir quickly just until the dough is blended and begins to mass.
Turn the dough immediately out onto a floured surface, and with floured hands knead briskly eight to ten times, until it becomes cohesive.
Gently flatten the dough with your hands into a disk of even thinness; then, using a floured rolling pin, roll it out to a uniform thickness of 1/2 inch. With a dinner fork dipped in flour, pierce the dough completely through at 1/2-inch intervals. Lightly flour a 2½ or 3-inch biscuit cutter and stamp out rounds, without twisting the cutter in the dough. Cut the biscuits from the dough as close together as you can, for maximum yield. Transfer them to a parchment-lined baking sheet, placing them so that they just barely kiss. Don’t re-roll the scraps. Just arrange them around the edge of the sheet, and bake them – cook’s treat.
Put the baking sheet immediately on the center rack of the preheated oven.
Bake 10-12 minutes, checking after 6 minutes or so, and turning the pan if needed for even baking. When the biscuits are golden brown, remove from the oven and brush the tops with the melted butter.
* Homemade baking powder recipe by Edna Lewis
¼ cup cream of tarter
2 tablespoons baking soda
Mix well and keep in an air tight container for up to 6 months.
If you have ever driven US Route 101 in California near San Luis Obispo there is a kitschy land mark that has welcomed cattlemen, cowboys, cowgirls, brides, honeymooners and road travelers since 1958. Ladies and Gentlemen I am referring to The Madonna Inn, I cannot remember my first time there but I can tell you I was little, maybe four or five. The pink walls, pink patterned carpets, oversized floral bouquets, huge crystal goblets, Swiss milkmaid waitress uniforms, pink sugar for ice tea or coffee, copper toped tables, copper salt and pepper shakers and then the Copper Café’s famous Bakery. With over eight types of cakes and the same number of pies this bakery has grown tremendously not only in kitsch but in the hearts of many who have eaten sweets from this step back in time bakery. Some of the newest additions are chocolates, cookies, cupcakes and other sweet treats.
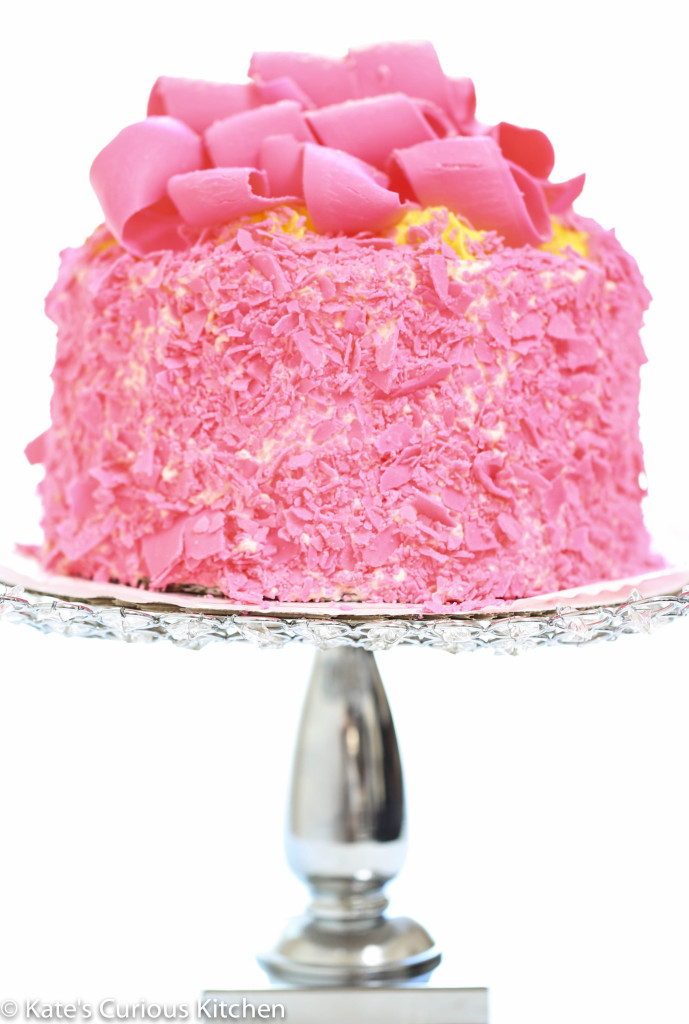
However, there is one cake the Madonna Inn is famous for creating and that is, the Madonna Inn Pink Champagne Cake. Three-lovely and feather light white cake layers all snuggled in-between a whipped almond flavored Bavarian cream and fresh made whip cream. The outside of the cake is iced with a whip cream icing and tiny hot-pink colored white chocolate crumbles are pressed into that amazing whip cream. Then the ultimate cake topper or crown is stacked mile high, curls and curls of that same hot-pink colored white chocolate then those thick ribbon like curls have a soft dusting of powder sugar on top. The finished cake resembles a beautifully decorated French hat box with billowing satin pink bow.
I could eat this cake all the time, yes it is rich, yes it is sweet and yes it is full of sugar, fat, cream and chocolate! It is worth every extra pound I have put on my body by eating it over my 39 years on this planet. I love this cake, I cannot express it any other way than just that, its a little girls dream cake always has been to me and it will always remain that way. When you take your road trip to the famous Madonna Inn spend time there, do not rush your visit. Go have a bite to eat at the Copper Café or sit down at Alex Madonna’s Gold Rush Steak House and enjoy a cattleman’s dinner among the 1960’s style pink tucked leather booths. Billowing all around you are the pink silk flowers, twinkle lights, Tiffany style chandeliers and if you can find her there is the little doll perched high over your head swinging away in her tree swing, the soft sounds of music floating in from the Silver Bar Cocktail & Lounge and maybe on a good night you will see Lady Madonna herself, Mrs. Phyllis Madonna. Ask her to come over and tell you her story about why her loving husband Alex Madonna built this Americana landmark.
I was just there a few days ago picking up my lovely 8” round cake (for a steal at $35.00) and I asked the young lady helping me, “is that fresh whip cream that’s used on the out side of the cake and in-between the layers?” Her response “Yes, on the outside and only one of the layers the rest are whipped almond flavored Bavarian cream.” Then I asked, “do you color the chocolate here, is it a powder color or a liquid?” She replied “I’m sorry I can not tell you.” Can you tell me if you make the curls and crumbles here?” “Yes, we do. “ “Can you tell me if it’s an egg white cake like a chiffon?” With a pause and a slight head turn she stated- “quite possibly”. That was it, I had the basic information now to drive home and get this sorted out.
To date I believe I have introduced well over 150 people to this cake, my husband and my three children have been the best sports whenever we hit the road to travel north. They know that the car is going to pull over so I can have a walk back in time with my memories and create new ones with them. My daughter flutters in all the pink and glitter, my sons they like the downstairs men’s room. Why? The men’s bathroom is famous; maybe a bit more than the cake, it has a motion-censored waterfallinstead of a urinal and when my youngest son was about three-year-old that was the best experience he could ever have at using the big boy potty. On average I loose my youngest son to that waterfall at least four times during our meal. I can promise you stopping at the Madonna Inn will brighten your day, you will have the biggest smile on your face and a good giggle too. Go get some cake, go look around, count how many colors of goblets there are, walk the gardens, sneak a peek at the waterfall and please tell Phyllis hello from me.
Cheers!
Champagne Cake
Light and tender white cake with a hint of champagne and almond.
Ingredients
1. ¾ stick of softened unsalted butter
2. 1 ½ cups granulated sugar
3. 3 cups sifted cake flour (swans)
4. 1 teaspoon vanilla
5. 1 teaspoon champagne extract or almond extract
6. 1 tablespoon baking powder
7. ½ teaspoon salt
8. 1 cup room temperature whole milk
9. 6 egg whites at room temperature
Instructions
1. Preheat oven to 350 degrees F. Grease and parchment line 2-9 inch cake pans. With an electric mixer or stand mixer on medium speed, cream butter and sugar. Mix in vanilla, champagne extract or almond extract. In a separate bowl, sift cake flour, baking powder and salt. Add flour mixture alternately with milk until all combined. In a clean, dry bowl beat egg whites until stiff but not dry. With a rubber spatula, add a scoop of the egg whites to the cake batter and slowly fold in, add a little more egg white and fold in, continue until all the egg white is incorporated into the batter. Divide batter between pans. Tap on the counter to level.
2. Bake for 25 to 30 minutes. Test with toothpick for doneness, only tiny amounts of crumb should hold to the toothpick. Cool cakes in pans for 10 minutes then turn over onto rack for 10 minutes. Remove pans and allow to cool completely.
Notes
Assembling the Champagne Cake
1. Take one cooled cake round and place it on a serving plate or cake board, spread a ½ inch layer of the Bavarian cream all over the cake but keep the cream a ¼ inch from the edge of the cake.
2. Split the second cake layer in half horizontally and place the first of the split layers on top of the Bavarian cream, center your cake. Add a ½ inch layer of your stabilized whip cream keeping a ¼ inch from the edge of the cake.
3. Place the second layer of the split second cake on top of the whip cream and now spread a ½ inch layer of the Bavarian cram. Making sure to keep it a ¼ inch from the cake edge.
4. Place you last cake layer on top of the Bavarian cream, push the cake layers down slightly to level then smooth a good layer of the whip cream all over the cake and press the hot-pink chocolate crumbles into the sides and top of the cake.
5. For other decoration, you can add the Bavarian cream to a pastry bag with a star tip nozzle and decorate the top and bottom of the cake base. Keep cake refrigerated.
Whip Cream Icing
This is a stabilized whip cream icing. It is necessary so the whip cream does not slide off your cake.
Ingredients
1. 2 cups very cold whipping cream
2. 3 tablespoons sifted powder sugar
3. 1 teaspoon clear vanilla or almond extract
4. 1 teaspoon gelatin
5. 1 ½ tablespoons cold water
6. 1 ½ tablespoons boiling water
Instructions
1. To prepare the gelatin, get a small bowl and add the cold water to it, sprinkle the powder gelatin over the water and let it sit for 5 minutes. Add the boiling water to the gelatin mixture and stir to dissolve. Set aside.
2. Whip Cream; place your cold whip cream, powder sugar and flavor in a mixing bowl use a hand mixer or stand mixer on medium high speed for 1 minute, slowly add the liquid gelatin to the cream and then mix until stiff peaks form- be careful, if you mix it too long you will have butter. Keep in fridge until ready to ice cake.
Notes
1. If you choose to color your whip cream, make sure to add your coloring to the cold whipping cream before you start to mix it.
Bavarian Cream
Makes 4 cups
1 package Instant Vanilla Pudding (5.1 oz package)
2 cups heavy whipping cream
2-5 Tb. milk
Directions:
Beat the whipping cream on high until stiff peaks form. Run the mixer on low while slowly sprinkling in the pudding powder. Mix until fully incorporated. Add milk 1 Tb. at a time, to reach desired spreading consistency. Add more milk for a thinner, smoother filling.
Pink Chocolate Crumbles & Curls
Ingredients
1. 2 bags white chocolate chips
2. hot pink food color
3. whisk
4. double boiler
5. parchment paper
6. spatula
7. OR USE
8. Wilton Candy Melts in hot-pink, follow the directions on the back of the package on how to melt the chocolates. When you have a smooth consistency spread the melted chocolate in an even layer on parchment paper and allow it time to cool 15-20 minutes. Once cooled break up into small pieces and keep covered until ready to use.
Instructions
1. Double Boiler Method
2. Heat water in the bottom portion of your double boiler, bring to a boil then turn the heat to low so the water is simmering, in the second bowl add the white chocolate chips and place that bowl over the simmering water, wait 5 minutes then slowly start stirring chocolate. When only a few lumps remain take the bowl off the hot water and continue to stir placing the bowl on a folded towel it will help keep the chocolate warm and the bowl will not slip. When the melted chocolate is smooth add a few drops of food color and mix well. Then spread out your chocolate on a piece of parchment paper and allow to cool for 15-20 then break it up into pieces.
I remember making soft pretzels for the first time in my 8th grade home economics class. In my small cubical kitchen with the electric stove that took hours for water to boil, I honestly fell into another world of pure contentment every time I walked through that classroom door when I attended Anacapa Middle School. I learned to make muffins, cookies, breads, sauces, chicken cordon bleu, pasta dishes and my teachers family recipe for German soft pretzels. That class was such an escape for me, I liked school don’t get me wrong it was just that my time in that particular class was truly a foundation builder for me, I effortless earned my A+, my teacher had my full attention and dedication every day during those extraordinary 90 minutes. I learned that baking recipes should be measures in grams because 1 cup of whole-wheat flour weighs differently than 1 cup of all purpose flour or 1 cup of cake flour, I suggest you all get a digital scale and see just how different the weights are. I also learned that when making pretzels, fresh baking soda was key as well as doubling the amount called for. My teacher said it added an extra chewiness to the outer skin of the pretzel and helped to develop the deep golden color along with the egg wash.
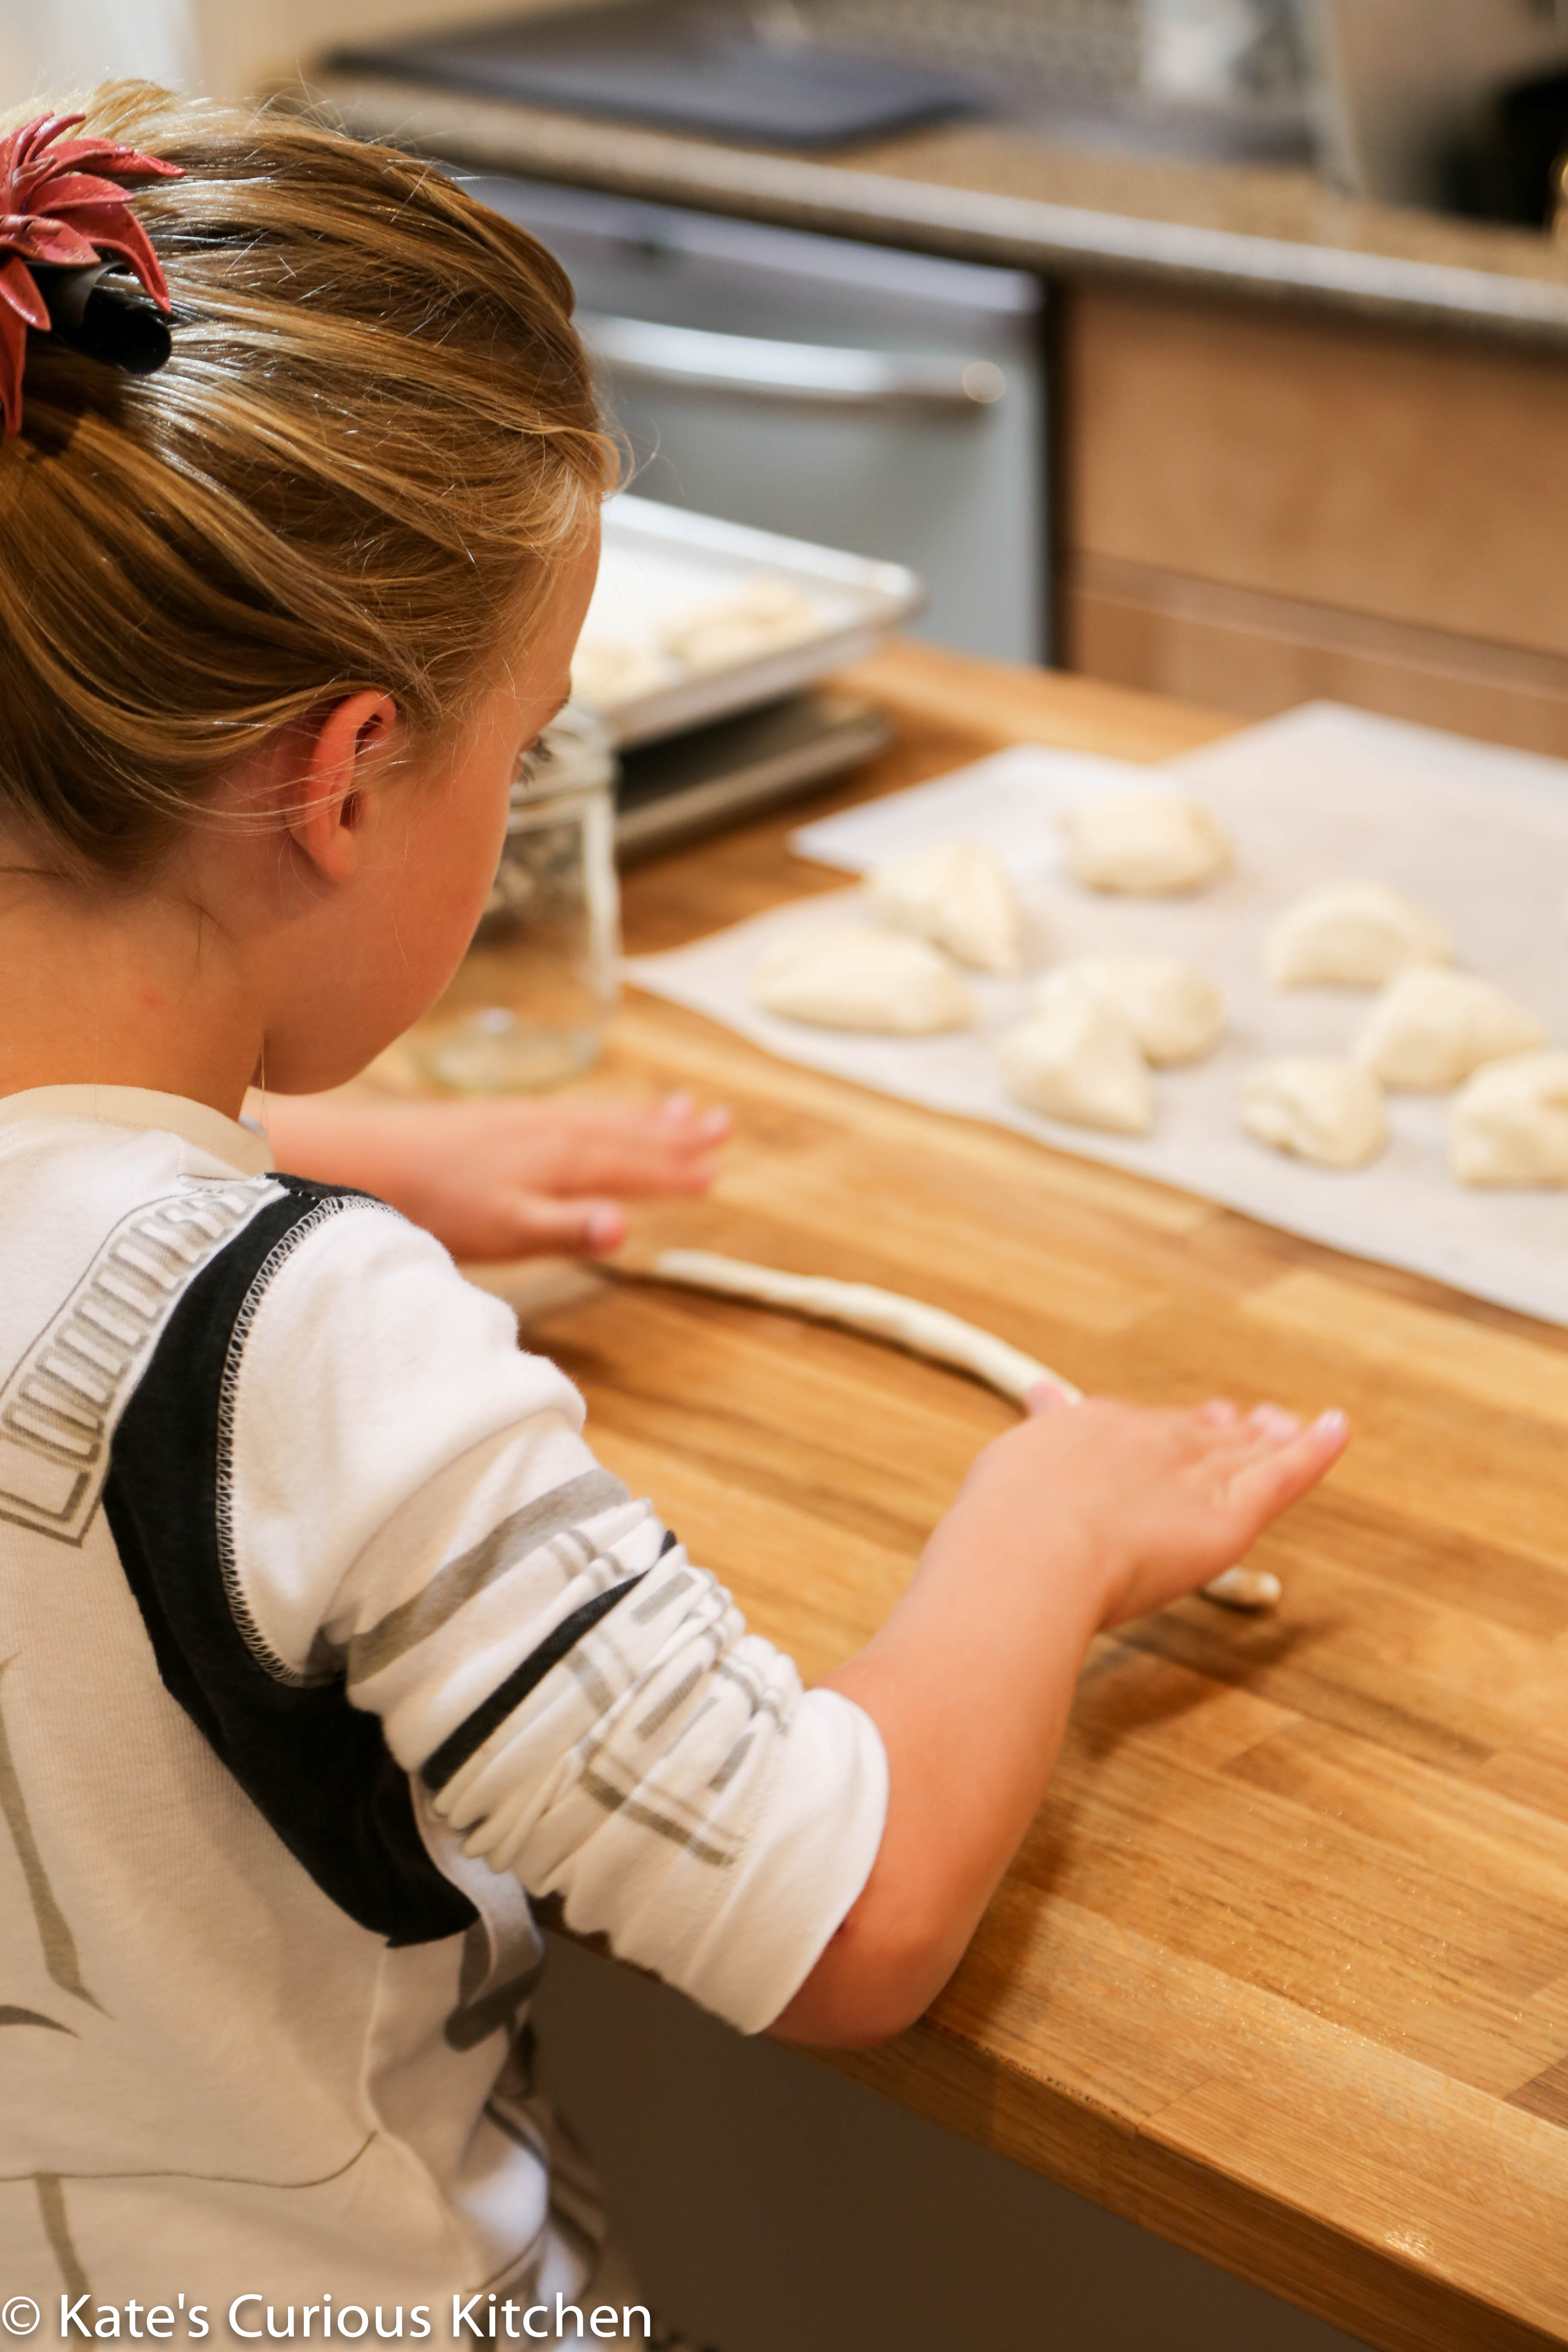
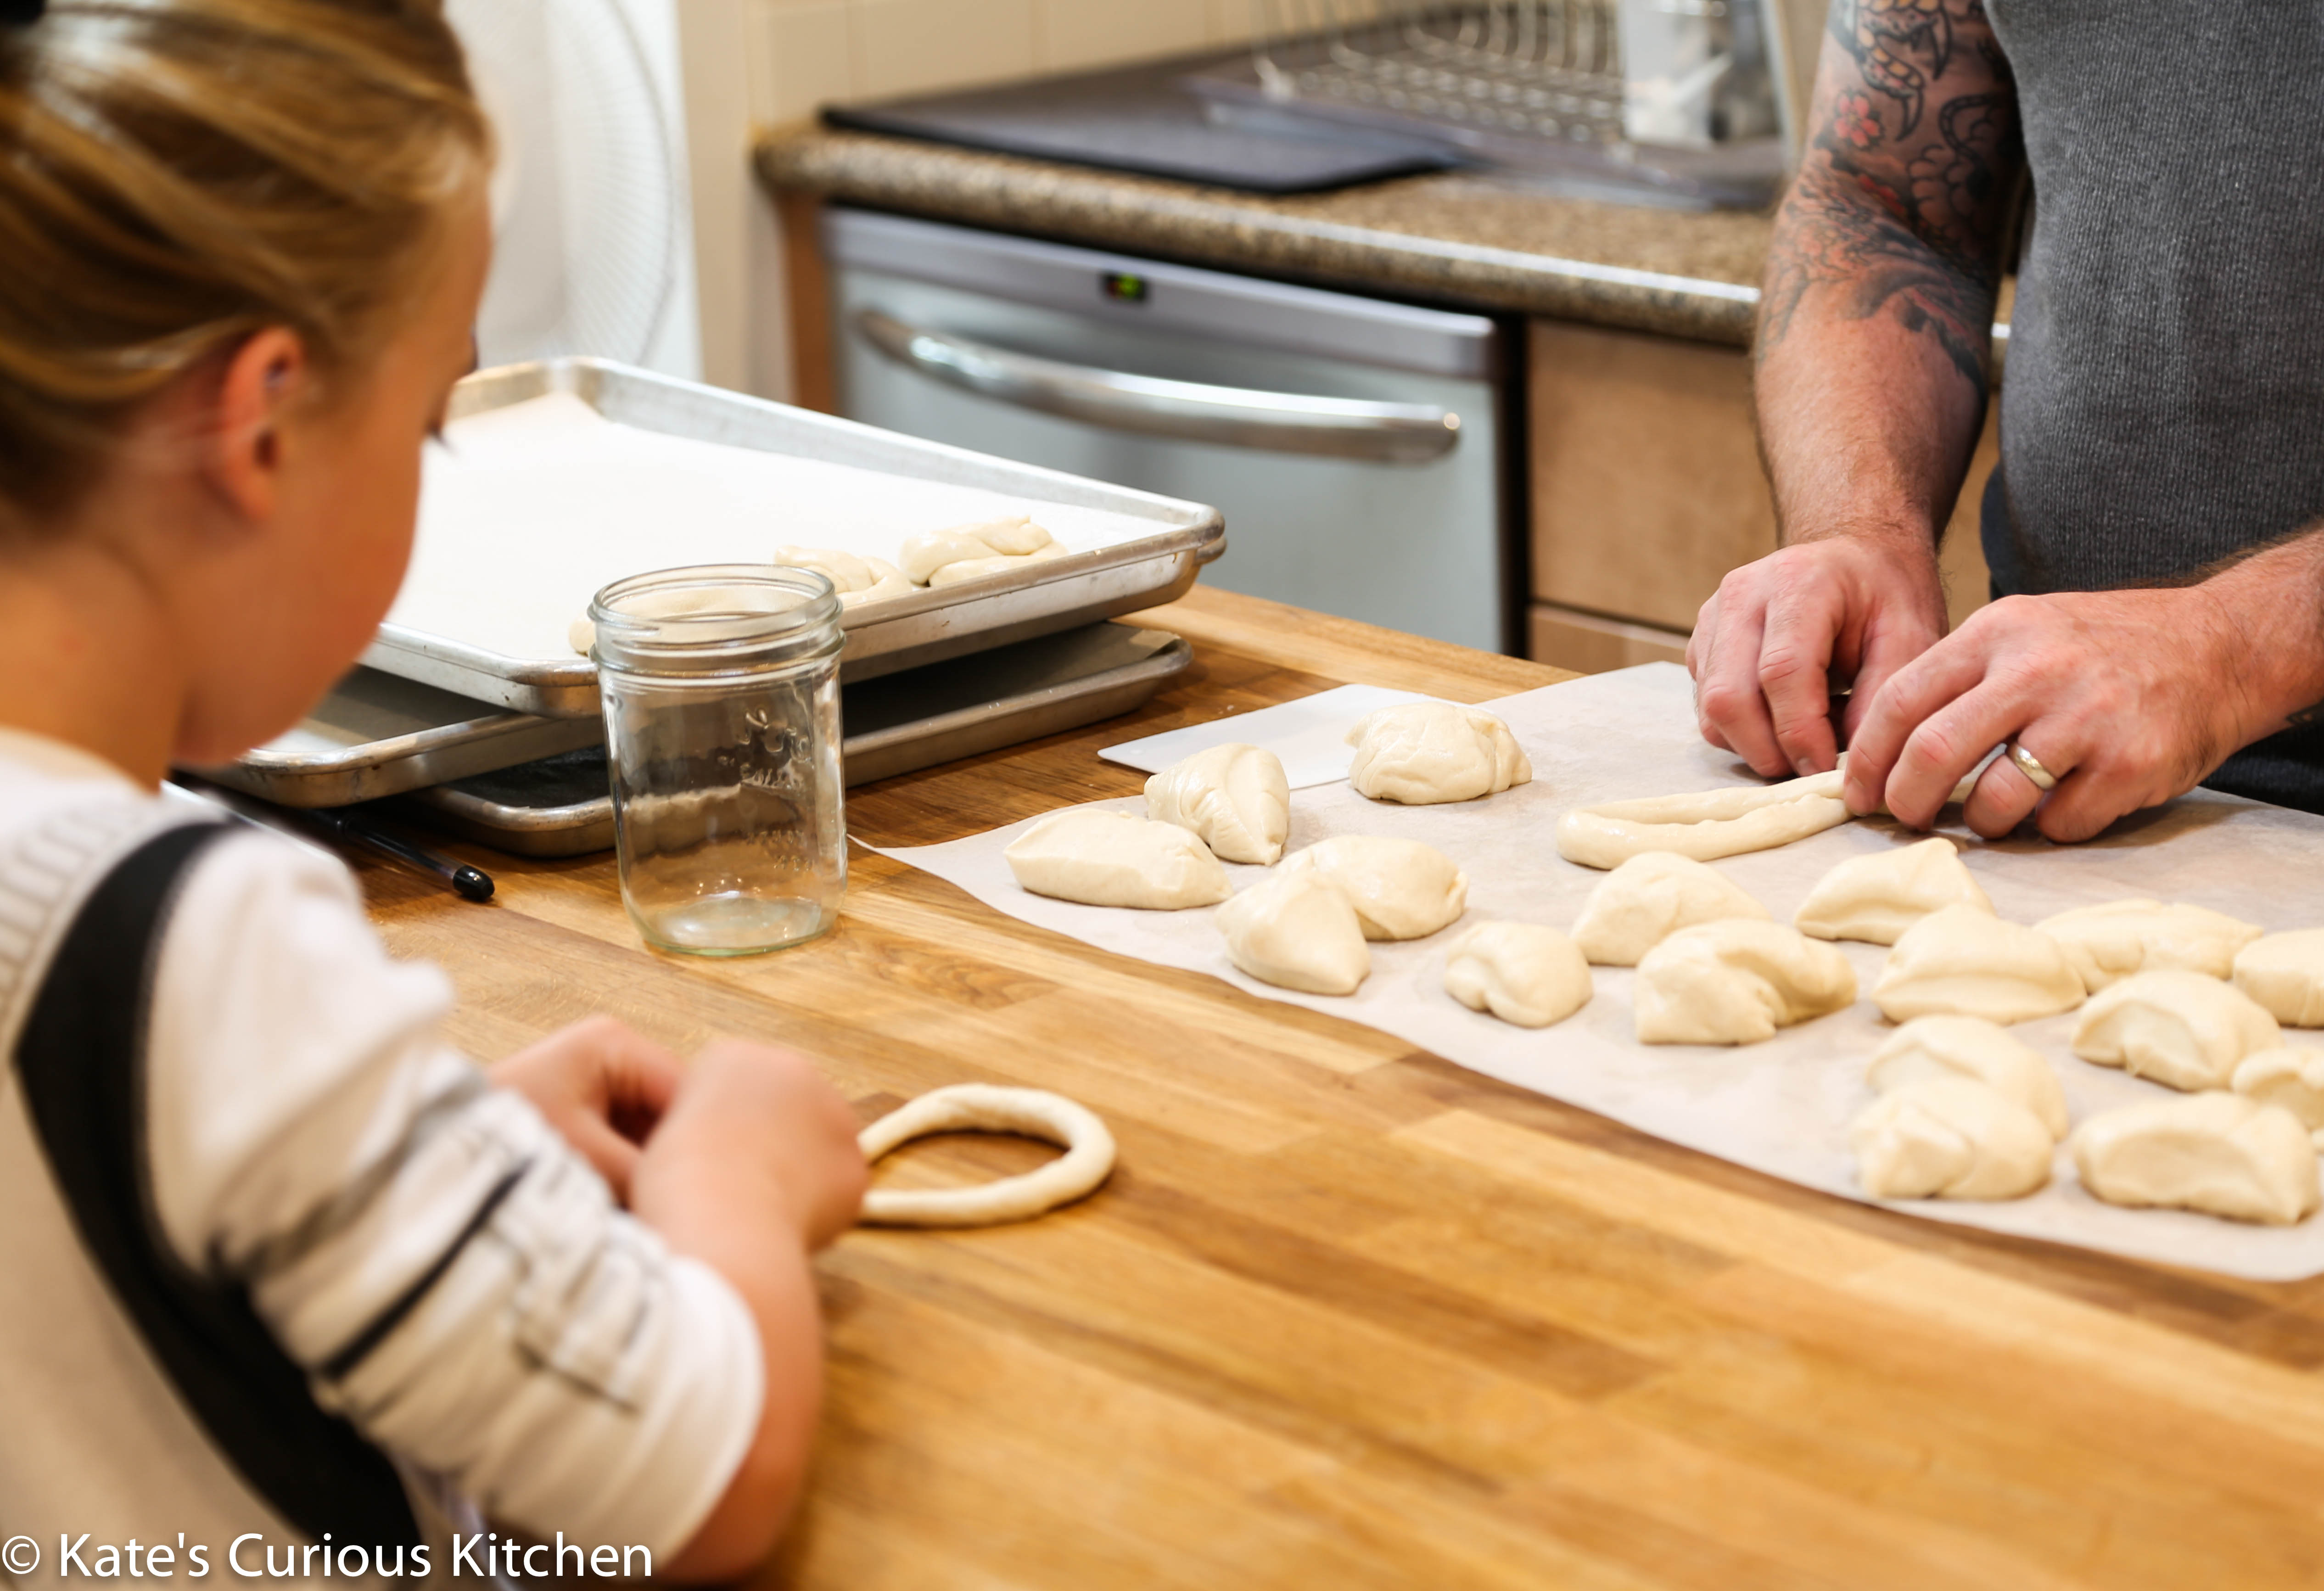
This past weekend I asked my family if they wanted to help me make a batch pretzels, my daughter, Paige, jumped up and excitedly did the “I’m going to help mommy in the kitchen dance.” Lots of butt wiggling, some jumping spin tricks too. Her brother, Andrew, took a pass he just received a new lego set and that was his center of attention for the day. My husband was thrilled; he’s a really good pretzel maker it has to be because of his German heritage. I believe soft pretzels have to be my husband favorite snack food; he loves them more than salt and pepper potato chips. His all time #1 nostalgic type pretzel are the ones served at Disneyland, they are in the shape of Mickey Mouse. Ok, I cannot lie I like them too.
My Daughter also has taken to making pretzels like her father, so I am even more convinced it’s in her blood. She was rolling the dough out with her hands, stretching and lengthening it with every pass. Paige carefully took the snake like dough ropes and made the shape of the letter U to start then she crossed the ends over the required two times and then secured the twist to the big loop. Time after time she got a little bit better, she was in a fierce competition with her Father to see who could make the most pretzels- I’m giving the win to her, she’s adorable and she throws better fits than her father. I did overhear her at one point saying “daddy, I love helping mommy cook it’s so much fun” to which my husband replied “well, Paige now you can be mommies Sous chef, her all time helper.” She replied “ I like that and it means I get to be her taster too.” I’m blessed what can I say I have a mini-me.
Here are a few tricks I learned from my teacher and I am glad to share them with you.
Use bread flour instead of all-purpose flour, the bread flour has more protein than all-purpose flour, which helps the gluten bonds develop. When you want a chewy or elastic texture this is your go to flour.
Always double the amount of baking soda in any soft pretzel recipe. The average recipe calls for 2/3 cup in 10 cups of water, add 1 1/3 cup baking soda, it helps the dough swell quicker in the boiling water. It also dries the outside a bit so the dough browns better with the egg wash in the oven.
Oven should be set to 425F (the extra baking soda is going to make it brown faster) and use the convection setting if your oven has it.
Use Kosher or sea salt.
There you go, secrets to an amazing soft and chewy German style pretzel.
This time I changed the seasonings up a bit, on half of the batch I did the traditional egg wash with Kosher salt but the other half I used the egg wash and sprinkled my everyday seasoning on it. Talk about a different flavor but a truly wonderful one at that. Salt, pepper, granulated garlic, granulated onion, and parsley. That addition along with the baking soda’s acidic wash was unbelievable, I hope that you try it some time. I included my every day seasoning too along with my pretzel recipe. Grab some deli style mustard or make a smooth and creamy cheese sauce and enjoy the fresh flavors and surprising fun you will have making fresh German style pretzels.
Cheers!
Soft Style German Pretzels
DOUGH
1½ cups warm water (105-110)
2 tbsp sugar
2 tsp Kosher salt
2½ tsp or (1 pkg) yeast
4 cups bread flour
4 oz melted unsalted butter
WATER BATH
10 cups water
1 1/3 cups baking soda ( do not double this amount, it already has been for this recipe)
EGG WASH
1 large egg yolk beaten with 1 tablespoon water
TOPPING
Kosher salt or sea salt
Instructions
In the bowl of your stand mixer add the salt, sugar, melted butter and warm water. Mix with a whisk until sugar and salt dissolve. Sprinkle yeast in water and give it a quick mix with the whisk, let set for 5 minutes. Add all the flour to the yeast mixture and with a dough hook, mix on low speed until combined, then raise the speed to medium and let mix for 8 minutes.
Take dough out of the bowl and set it on a clean dishtowel. Oil your mixing bowl lightly and return the dough to the bowl, turning once to make sure the dough has an even coat of oil. I like to use grape seed oil. Cover bowl with plastic wrap and place the dish towel over it, let it rest in a warm place in your kitchen for about an hour. It should be doubled in size.
During the rise time, line 2-4 baking sheets pans with parchment paper and lightly spray with cooking spray. Bring the 10 cups of water and the baking soda to a boil in a large pot. Pre heat over to 425 F.
When the dough has risen, lightly oil your work surface, turn out the dough and divide into 8 pieces. For large pretzels, roll out each piece of dough into a 2 foot rope. Make a U shape and flip ends of the rope across each other two times to make a rope twist and press onto the bottom of the U to create the shape of a pretzel. Place onto the baking sheets.
To make mini pretzels take the 8 pieces of dough and roll each ball out a few times until you get a t 4” log shape, divide that into 3 pieces, roll each dough piece into a rope shape, make the U shape and flip ends of the rope across each other two times to make a rope twist and press onto the bottom of the U to create the shape of a pretzel. Place onto the baking sheets.
Very carefully place the pretzels into the boiling water, two at a time, for 30 seconds; I lightly flip them over at the 15-second mark. Remove with a slotted spoon and place back on the baking sheet, brush the top of each pretzel with the egg & water wash then sprinkle the pretzel with your salt.
Bake 20-25 minutes for the large pretzels 12-14 minutes for the small pretzels or until golden brown. Watch carefully a golden brown pretzel can burn very quickly.
Place on a cooling rack.
Everyday Seasoning
Ingredients
1 cup Kosher salt
1 tablespoon granulated garlic
1 tablespoon granulated onion
1 tablespoon fresh ground pepper
1 tablespoon dried parsley
Instructions
mix well and store in a jar or zip top bag.
Notes
A few other ingredients you can add to change up the flavors are: dried rosemary, mustard powder, cumin, dried basil or chili powder.
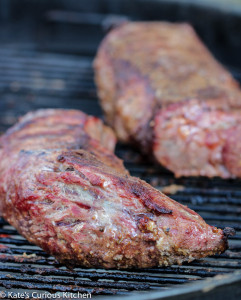
Welcome to California’s pride and joy of barbecue! This small to medium-size triangular muscle of the bottom sirloin subprimal cut (my God that was exhausting) screams for a good amount of spice, smoke and heat. I have done the official research and the credit needs to go to one man for making it as popular as it is today here in the golden state. Otto Schaefer marketed this cut back in 1950 in Oakland, California. But as far back as 1931 the cattlemen of the central coast, the Santa Maria area, were barbecuing meat on strings over hot coals with basic seasonings. Then the adoption happened Tri-Tip became Santa Maria’s ” signature pride and joy cut” truly barbequed beef was launched into a new territory. Go ahead, Google “Santa Maria Style BBQ.” I dare ya, oh and have a towel ready, you’re going to drool and go racing out to your nearest butcher to obtain this precious low-fat, full flavored cut of beef. I have two in my fridge right now about ready to kiss the grill any second.
There is a bit of a disappointing part, many butcher shops east of the California/Nevada/Arizona border do not market the tri tip cut-you’re going to have to ask for it. This is where you will start to build a relationship with the specialist; a butcher, a professionally trained expert in the animal protein world. If you already have a good relationship with yours it’s going to get even better. I don’t know a butcher around that does not want to market the “next best cut” and tri tip will do it in spades. I’m also guessing you will be able to purchase it for quite a bit less than us right now I paid about $9.95 a pound. The secret is to not overcook this marbled fat flecked beauty. Medium is about as done as you will want it. The soft pink hue throughout its center is the signature look with its crusty pepper, garlic, salt and onion seasoning that perfectly kisses the char marked and smoked tri tip is out of this world.
PFC. Dunbar United States Army
My son, Sean, has the say on this share, he’s kind of nuts over my barbecue seasoning and knows it’s one of my secrets. Before this entry is published I will send him the ingredient list so I can uphold my end of the bargain to let him know first above all others. I created my seasoning blend about 15 years ago, yes I was happily barbecuing away at age 24 living in my tiny two-bedroom home with my son Sean trying to make it as a single mom living humbly, very humbly. I would save my money all month I would budget correctly and buy one tri-tip then I would do the sin of the earth, I would cut that piece of beef into three smaller pieces so we could eat barbecue almost every Friday.
I would make a small pyramid of charcoal briquettes in my weber kettle grill then with a small well in the top I would crumple some newspaper and light it. When the coals were blazing red and covered in heavenly white ash I would place the grill grate over the coals and lightly oil it using a few paper towels crumpled together and soaked in a bit of cooking oil held with tongs and brushed over so the meat would not stick. I would wait about 10 minutes for that grill to get searing hot. Then I would throw a few mesquite wood chunks (not chips) on the hot coals just moments before the meat was put on the grill, quickly the backyard filled with sweet mesquite smoke the black pepper, garlic, onions and chili spice too. The sizzling and popping sounds from the searing meat and fat (I just drooled) were the symphony of a perfect Friday night Mother and son tradition. I would let that small portion cook on the grill for about eight minutes then I would turn the meat over and cook the other side about eight minutes longer. When it was ready I would take the tri tip off the grill and give it a good 10 minute rest time before slicing it. My choice is to slice it against the grain so the meat is most and tender, I would also make my slices about a ¼” thick, traditional tri tip cuts are about ½” thick. Sean would be waiting at our table in his seat just smiling away, as he ate I would watch my son melt in that tri trip’s smoky mysterious taste. I loved those Friday night dates with him, when he comes home on leave from the Army this one of the first meals he asks for.
If I was grilling a whole tri-tip it would be cooked a bit differently I would set up the charcoal in an indirect method, hot coals on one side of the kettle, empty space on the other. When it was time to put the meat on the grill grate you place it on the side without the heat directly below. Put the lid on and position the vent holes over the tri tip to: draw the smoke around it further to add to the richness of the flavor, have the vent holes about 3/4 way closed. After about 45 minutes it was done and off the heat with a resting time of about 10 minutes. If you’re using a smoker 225° for about four hours with good mesquite, apple, or even pecan wood but only for the first two hours. Adding wood chunks will produce one heck-of smoke ring; it’ll be a gem! Get out your grill, clean it down, oil the grills grates and go see your butcher.