Uncategorized

Cheese Please!

It’s All About the Presentation

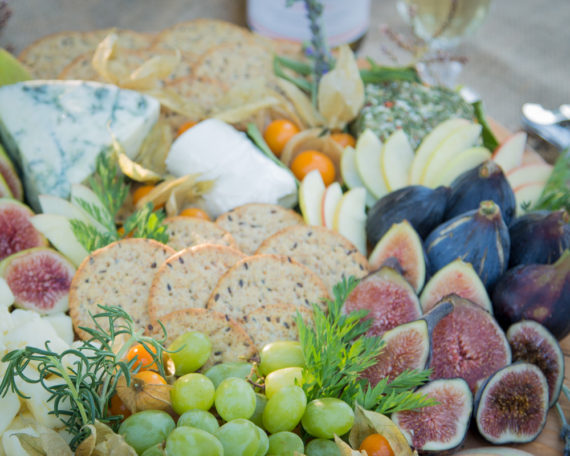
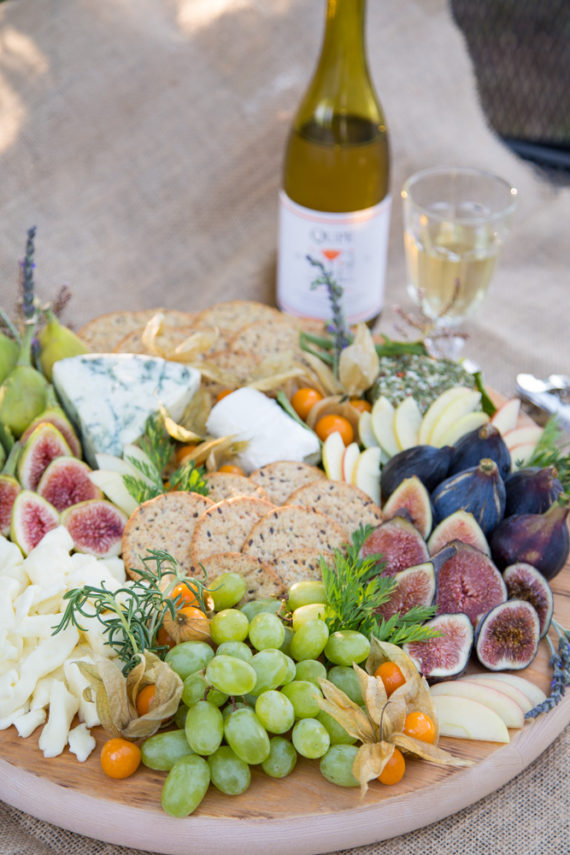
I love a beautiful cheese plate, I love it a bit more when I make it for my friends. In the camping group I belong to, Sisters on the Fly I am know for being the Sister who introduces many to the glorious flavors of  Mt Tam, Humboldt Fog, Triple Creme, Chèvre and many more. My key ingredients: soft cheese, hard cheese, dried fruits, fresh fruits, nuts, fresh herbs and good tasting crackers. Below I have everything broken down for you to successfully create a stunning cheese platter. Pictured is a bottle of Qupe Viognier wine, it has a light floral note along with a delicate peach and apricot taste which is perfect for all the flavors I have presented in this image.

Top Cheese Picks

Soft Cheese; Brie, Camembert, Chèvre (goat), Mozzarella, Cream Cheese. They are very soft, creamy and buttery in flavor.

Semi-Soft; Havarti, Munster, Fontina, Dorset. These cheeses have a soft earthy flavor they go very well with dried fruits and jams.

Medium-Hard; Gruyère, Gouda, Edam, Cheddar, Monterey Jack, Parmesan, Pecorino. These cheeses are sharp in flavor, low in moisture and have aged for a period of time.

Strong Flavor Soft Cheese; Blue, Gorgonzola, Roquefort and Stilton. These cheeses are salty, strong in flavor and tend to have a distinct musky odor.

Dried Fruits

I love dried fruit especially in the winter when everything is just about out of season. Turkish apricots, golden raisins, cranberries, dates and figs. If I have time I will take the dates, remove the pit and place a good dime size piece of gorgonzola cheese in them. That strong salty cheese is perfect for the sugary sweet date. If I really have some time I will wrap a piece of bacon around it and broil for about 15 min then drizzle with a good aged honey & fig balsamic vinegar.

Fresh Fruit

Sliced apples like Granny Smith, Pink Lady, Honeycrisp and Gala, are perfect for your cheese platter but make certain to follow this tip so they don’t turn brown when sliced. After you slice your apples place them in a bowl of cool honey water (2 c water & 1 Tbls of honey mixed well) for about 10 min then pat dry, they will not brown. Berries; raspberries, blueberries, strawberries. Grapes, my personal favorite are the Champagne grape, small and tiny clusters of very sweet grapes the size of a pea. Witches fingers taste amazing and look very much like a witches finger (kids love them). Figs; Brown Turkey, Celestial, Honey Fig, Desert King, White King and Red Italian. Melon; Cantaloupe, watermelon. Pears; Bosc, Asian, D’Anjou, Bartlett and Comice

Nuts

Pistachios from the Santa Barbara Pistachio Farm (we have them here in Texas!), seasoned pecans, almonds and if I can get them whole and walnuts. I place the walnuts in a bowl with some chopped rosemary, sea salt, cracked black pepper and I drizzle a bit of honey mix well and serve in a olive bowl.

Crackers

Water crackers, unflavored is my choice and they are the best serves with Brie cheese or your Blue cheeses. Herb toasts are perfect with Chèvre, multigrain are amazing with well aged cheddar and the crackers with dried fruits and nuts pair very well with Camembert.

Extras

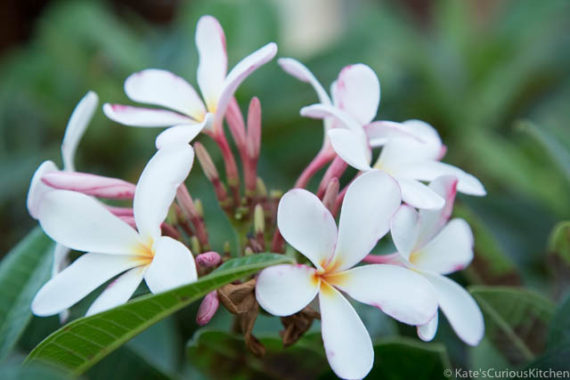
Sometimes you need to fill in some space or make the plate look a bit dressed up, fresh herbs over flowers are my go to every time. I like rosemary, dill, parsley, thyme, chives and sage leaves.


The Best Ever Lemon Cake

All right, its seriously grey here in Central Texas. Its like Eeyore has just decided to bring his gloomy attitude here and sit a spell. I sat there looking out the windows at the leafless trees, the dead plants from our two great freezes and I had to do something. I had a few lemons and right away I knew no matter what I was going to get the sun to come out. So I’m doing a 30 day lemon challenge! That’s right, every day I will make something to eat or drink that has lemon in it. I will be posting on my Instagram page “Kate’s Curious Kitchen”. Please join in and share your lemon creations too. The more folks/people/followers participating the faster winter might finally be chased away.

I long for Spring time here in Texas. It is magical, from the wildflowers, to the new tree buds, the birds and the precious longhorn calves. If you have never visited the Hill Country of Texas the area I am talking about is roughly 25 counties, which spans from San Antonio north to just above Lampasas, then Austin on the east side to Junction on the West. This area screams winter is over when the blue skies touch the ground here with one small cobalt to periwinkle blue and bright white tipped flower, the Texas bluebonnet. You can not drive down a road with out stopping. They say no Texas family photo album is complete until there is a baby picture with that little one sitting in the sea of bright bluebonnets.


So my challenge is simple. I need to use a lemon everyday for 30 days either by creating a new recipe or finding one in my over 500 cookbooks then cook! I’m going to call the sun out of its slumber with dishes like lemon ricotta pasta and grilled salmon with a white peppercorn and lemon sauce. I might possibly sip a lemon drop martini or make my smashed blackberry and bourbon cocktail with a lemon twist. Then I will coax that beautiful sun with my famous lemon bars (I was in Sunset Magazine for them) or my precious cafés signature lemon cake. Matter of fact that is where I’m starting! So join along with me in this bright, cheery and fun food challenge!

Enjoy.

Petite Revé Cafés Lemon Cake


INGREDIENTS

1 cup unsalted butter, softened

1 1/2 cups granulated sugar

1 teaspoon almond extract

2 lemons zested and juiced, place zest in a separate bowl

3 1/2 cups cake flour, Swans Down is the best

4 teaspoons of baking powder, *recipe is below

1/2 teaspoon  kosher salt

6 large egg whites, room temperature

1 1/2 cups whole milk, room temperature

INSTRUCTIONS

1. Grease three 9-inch by 2-inch pans with butter or cooking spray, just not butter flavored spray. Line the bottom with parchment paper and grease the top of the parchment. Preheat your oven to 350 degrees.

2. In a stand mixer, cream the butter and sugar together, two minutes, scrape bowl down and add almond extract. Mix again for 30 seconds.

3. Add egg whites and milk together, mix with a fork until combined. Add lemon zest in and mix again. Set aside.

4. In a clean bowl add cake flour, baking powder, and salt. Mix well.

5. Add 1/3 of the dry ingredients to the butter mixture and mix in until no traces of flour remain. Add in half of the milk mixture and mix until smooth. Add in another 1/3 of the dry ingredients until no flour traces remain followed by the remainder of the milk mixture. Add in the last of the dry ingredients and mix until just combined, using a rubber spatula to scrape the bowl to make sure all the dry ingredients are mixed in.

6. Divide the batter among the three prepared pans. Bake at 350 for 25 minutes for about 35 minutes or until an inserted cake tester come out clean. Once done, let pans sit on a cooling rack for 10 minutes then turn out and cool completely before icing.


*Baking Powder-single acting

2 Tablespoons Cream of tartar

1 1/2 Tablespoons cornstarch

1 Tablespoon baking soda.

Mix will and keep in a tightly sealed jar for up to 1 month.


Lemon Cream Cheese icing

2- 8oz bricks softened cream cheese

1 Cup unsalted butter, softened

3 Cups sifted powder sugar

2 Tablespoons lemon juice

Zest of 1 lemon

1. In the bowl of a stand mixer fitted with the paddle attachment, or in a large mixing bowl using an electric mixer, beat the butter and cream cheese on medium speed until smooth.

2. Add in the powdered sugar and mix on low speed at first, then increase to medium speed and continue mixing for another 1-2 minutes until the mixture starts to come together.

3. Add lemon juice and lemon zest, mix well

4. Ice cake and keep in the fridge until ready to serve.

A Tropical Scavenger Hunt

ALOHA!!!!!

Ok I will admit it I needed a change of view, the past two and a half years have been quite the bullet train ride of change and direction. I thought a good rest would help me focus on my blog, give me some recipe inspiration and it would also be a time for my family to just laugh, play and watch incredible sunsets. After unpacking the pantry in our new home I realized my stock of Hawaiian salts, spices, coffee and kiawe wood (guava wood) for my smoker were horribly low. With all of our bags packed  we flew 3,750 miles from our Texas home to the beautiful northern most point of the Polynesian triangle, Hawaii! We landed on Oahu and made our way through Honolulu on the H1 highway to the west side of the Island. Ko’Olina was our home away from home with its pale brown sugar sand beach and that azure blue ocean I could feel my stress slipping away.  As a bonus our home had a fully stocked kitchen and a beautiful outdoor BBQ area that just called to me.

I decided before we ever set foot on the plane that the majority of our meals were not going to be at restaurants, I was going to cook the bulk of them. I needed the prep to be easy  because we had places to go and things to do, from exploring a coffee and chocolate  plantation to a ride on the pineapple train. The extent of our food ingredients would be local and I wanted them as fresh as possible, I decided the best sources would be farmers markets, small farms, local stores and plantations. One important factor for me was time, my time! I was not going to spend all day in the kitchen cooking and cleaning while we were in Hawaii. Paradise provided only because I was willing to go on the quest!

We ate fresh caught fish, sustainably raised pork, chicken and shrimp I found organic fruit and vegetables that were grown about 10 miles from our condo. Every morning we drank coffee that was roasted just days before it was packaged from a coffee estate that welcomes visitors. I was able to source salt and seasoning blends made from ingredients right on the island. All right I admit it I even found Hawaiian shaved ice syrups for my children, in Texas shaved ice is a must when its 110 degrees and 99.9% humidity in August!


In the car and off for an adventure my family and I were set with one thing in mind, Kaluku garlic shrimp. Our island food scavenger hunt was on and this dish has to possibly be the North Shores best food destination. These shrimp trucks are world famous and I can not begin to tell you that a trip to Oahu is not complete with out driving up coast to the North Shore. It’s not the white sand beaches, the perfect waves at Waimea Bay or the miles of hiking in the lush rainforest in the Waimea Falls Park. Nope, it’s the garlic shrimp from the shrimp trucks of the North Shore!

At Fumi’s Kahuku Shrimp Farm these delicious sweet and briny local crustaceans are sustainably farm raised gems of the Hawaiian aquaculture. Pull over and take the tour the farm it’s there for you to visit and see how shrimp are grown and the inventive way they collect the shrimp from one of the 80 outdoor ponds will shock you. Get back in your car and drive up the road to the shrimp truck capitol of Oahu, it’s at most a 5-10 minute drive depending on how many chickens are trying to cross the road. I’m not kidding if you have watched the Disney movie Moana, you will see Hei Hei the ridiculous rooster everywhere.


To make this recipe as authentic as you can, use a rice cooker and Hinode rice; the #1 brand Hawaiians have used for over 40 years. A large heavy duty aluminum pan is also key, because you have to get that pan screaming hot for the short cook time. I have also added a few website links so you can easily shop for your ingredients, I do not receive any compensation from these companies, I have provided the links to save you some searching time.

Mahalo and enjoy!

Kaluku Garlic Shrimp 

Ingredients

2 pounds of jumbo shrimp, shell on, de-veined and patted dry.

15 cloves of garlic, chopped

1/2 cup flour, all purpose

3 teaspoons paprika

3 teaspoons Hawaiian Sea Salt or Sea Salt

3 teaspoon cayenne pepper

2 teaspoon black pepper

1/2 cup dry white wine

1/2 cup fish stock or chicken stock

Chopped parsley or chives for garnish

Sliced lemon

Instructions

In a disposable aluminum pan or pie pan mix together flour, paprika, cayenne pepper, salt and pepper.
Dredge the shrimp in the flour mixture, remove and set aside on a baking sheet, throw away remaining flour in the pan if there is any.
Preheat your large skillet for 2-4 minutes on medium high heat, add the clarified butter to the pan, heat 2 minutes.
Add chopped garlic to pan and cook for about a minute.
Add your seasoned shrimp, cook for 3 minutes.
Turn shrimp over, cook 3 to 4 until the shrimp are a rich pink color.
Pour wine and stock into the pan and start to scrape all the caramelized garlic bits from the pan, cook for 2 minutes, taste and add salt and pepper if needed.
Serve over steamed rice, garnish with chopped parsley and the lemon wedge if you choose.


Hawaiian Culinary Links

http://www.hinoderice.com/

http://wailukucoffeeco.com/

https://alohashoyu.com/

https://www.dakinehawaiian.net/

https://www.doleplantation.com/

http://www.foodland.com


Home Made Ice Cream

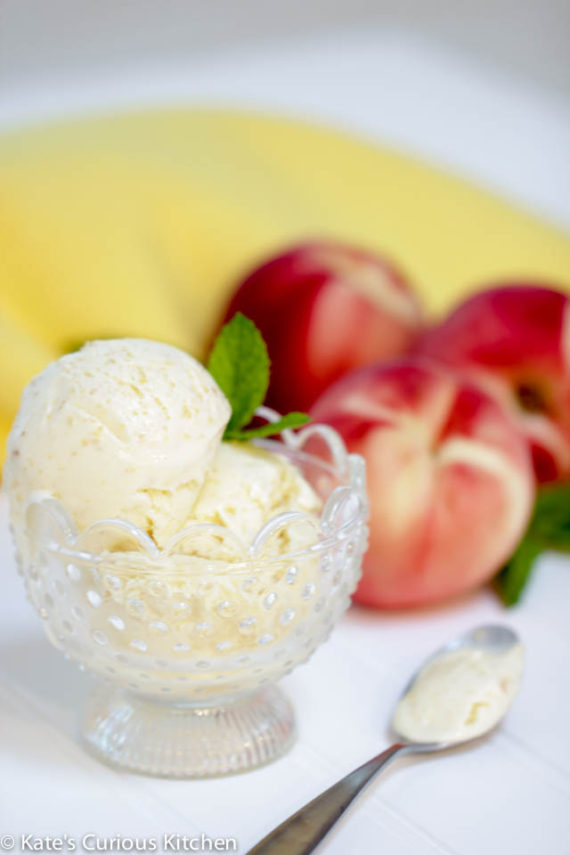
For years I have tried to make ice cream! Now really, how hard can it be? Hard! Either it’s too icy, too fatty or just not flavorful. However on a recent trip to Charleston South Carolina, I asked a pastry chef what was her secret? She said it’s in the milks and then in the bloom time-what is that? Walk me through the process, please. Would you believe it, she did! I learned that the French style (egg yolk based) is the best for ice cream. Half of the problem is the texture; and, that rich, creamy custard base is exactly what achieves the silky feel.

What to choose for the flavor; well, that is a tough pick. I’m a purist I prefer simple ingredients: vanilla beans that are plump and have possibly been sitting in a mason jar filled with Basil Hayden’s Bourbon for say maybe six months. Or, fruit picked at the peak of freshness and flavor. Peaches have just come into season here and they are amazing this year I see pints of peach ice cream in my future.

Now for the ice cream maker, long ago and far away, an old, banged up and battered, well-loved White Mountain hand crank ice cream maker was a staple during summer time. My backside would have frost bite from sitting on top of that machine for what seemed like hours. I’m going to pull a Sophia from Golden Girls moment on you. Picture it Ojai, California summer 1978 I’m three years old and it’s about 100° outside in the shade. My grandfather has just picked up ice and rock salt; my grandmother has just made the ice cream base. Outside on the patio, the ice cream making station was created. The frozen silver canister with its paddle was placed inside the wooden barrel ice cream maker, the ice cream base was added to that canister then the lid was attached and the sides were packed with ice and rock salt. A few folded burlap sacks sat on top of it keep it insulated. My Poppa would then grab a grandchild of his choice_ usually it was me_ and plop me on top of those burlap sack. Why you ask? Because my backside was small enough to sit on top of those burlap sacks on top of the ice cream maker holding the ice and salt in place. Poppa churned the ice cream until it was thick and frozen to perfection. When he was finished he, would throw me in the pool so my backside would warm up. Good times!

It was worth it! His vanilla ice cream tasted like nothing I have ever had. Unto this day I have still been trying to get it just right. So with the tricks of the different milks and the tip of bloom time (see recipe) I was given in Charleston by that pastry chef I came home and bought a Cuisinart ice cream maker and got to work. I came up with a recipe that used three different milk types: whole, half-and-half and whipping cream. It’s that balance it creates folds cream not milk crystals.

I hope you enjoy this recipe and please let me know how it works for you. I just visited the White Mountain ice cream maker website_ I’m thinking of getting one, I have twins their backsides are small just perfect for sitting on top of the ice cream maker! I could make a lot of ice cream this summer.

Cheers!

 Real French Vanilla Ice Cream

1 ½ cups whipping cream

1 cup whole milk

½ cup half and half

1 1/3 cup granulated sugar

4 egg yolks

1 whole vanilla bean

Pinch of salt

Optional: 1 cup chopped fresh fruit, ½ cup chocolate chips, 2 tablespoon fresh herbs, ½ cup jam or jelly, ½ teaspoon flavoring of your choice.

Directions:

Combine all three milks, sugar, and the pinch of salt in a medium saucepan.  Split and scrape the vanilla bean place it in the pot too.  Heat over medium-high, stirring occasionally, until the mixture is warmed through, do not boil just tiny little bubbles should form around the pans edge.  Remove the pan from the heat.

In a separate bowl, whisk the egg yolks until smooth and pale in color.  Slowly pour 1 cup of the warm milk mixture into the bowl with the egg yolks, whisking constantly this will temper the egg yolks so you won’t have scrambled eggs.  Return the entire mixture to the saucepan and place over medium heat.  Cook, stirring constantly and making sure to scrape the bottom of the pan, until the mixture thickens slightly and coats the back of a spoon (about 170 F).  Pour the ice cream base through the mesh strainer into the bowl; place vanilla pod back into the strained base, let the custard cool slightly, then cover and refrigerate until completely chilled (24 hours). Remove the vanilla bean before churning, add optional ingredients if wanted then follow the manufacturing directions of your ice cream maker and enjoy.


Happy Independence Day 2014!

Happy Independence Day! On this amazing day our country adopted the Declaration of Independence on July 4, 1776 and declared its independent from British Rule.

 I believe in celebrating this Holiday weather it is with friends, family, volunteering at a shelter or offering comfort at a Veterans center. This day has a special meaning to everyone that is a United States Citizen, it is our day to be proud, joyous and have a grand party! I was asked by a friend on our Facebook page to choose my top 5 Independence Day Memories, here they are and thank you Lisa for the question.

1. Months after my Spring trip to Washington D.C. with my 8th grade U.S. History class it was the 4th of July 1999, I closed my eyes and I was transported back to standing in front of the Declaration of Independence with my 40+ class members. I looked at a time warn and faded document that stated-

We hold these truths to be self-evident, that all men are created equal, that they are endowed by their Creator with certain unalienable Rights, that among these are Life, Liberty and the pursuit of Happiness.–That to secure these rights, Governments are instituted among Men, deriving their just powers from the consent of the governed, –That whenever any Form of Government becomes destructive of these ends, it is the Right of the People to alter or to abolish it, and to institute new Government, laying its foundation on such principles and organizing its powers in such form, as to them shall seem most likely to effect their Safety and Happiness.

Mr. Jerry Mittelholtz was my U.S. History teacher at Anacapa Middle School in Ventura, California. He was so passionate about history he wanted us to live it, breath it and see it first hand when we were there in D.C. My curiosity and love of History truly came from him and if I had the chance, I would tell him “thank you  for your lessons and love of teaching, you opened my eyes Mr. Mittelholts.”

2. Lake Cachuma, in Santa Barbara County California camping with my Grandparents. This was what Independence Day was with them: camping, fishing, tall tale telling, sleeping outdoors, walks around the lake and running around all covered in dirt throwing water balloons and getting bandaged up from all the trips, falls and crashed we took. We (the grandkids) loved every second of it. My Grandfather (Chuck his Holiday Rambler name) would pitch a huge screened in tent and inside that tent our cots, sleeping bags and lanterns would be lovingly put in order. When all of us kids were finally asleep, he would place apples all over the trees just outside of our tent so that in the morning when we woke up, deer were all around us eating those apples, it was magical.

Charles "Chuck" Slaton, my Grandfather.
Charles “Chuck” Slaton, my Grandfather.

3. A small town 4th of July parade in Ojai California when I was growing up. All of us kids would be on floats or on our horses riding down Main Street waving, cheering, laughing or crying (it would be over 105 degrees). But, I think my favorite year was the year of great pony escape. There were about 12 of us and our horses all set to line up and start the parade. Well, one of the poor Jr riders pony got spooked and like a bat out of hell that pony took off with the poor screaming and crying 7 year old stuck in that tiny saddle. We all shot off after her, the whoops and hollers we got from the crowds as be barreled down the road made us feel like we were racing down a calf at the rodeo. Needless to say we caught her along with that pony thankfully with the help of the team-roping club. Oh my gosh that was a 4th of July!

4. My Mom, this woman would prep for days making cakes, cookies, salads and then all the BBQ sauces, prepped the ribs, burgers, hot dogs and flank steaks for over 30+ friends and family members that would come to relax and enjoy the holiday with us. It was just another day for Helen with loved ones, food, laughs and memories, she lived for it.

5. My husband, my son both of my Grandfathers and countless family members that at one time wore or are still currently wearing the uniform of a service member in the Military. Last year was the first with out our Son around our home he was training at Fort Sill in Oklahoma with the Army poor child he had Toby Keith entertaining him, not my BBQ or his silly brother and sister. I remember my first Independence Day celebration as a Military wife- talk about pride! I went to the PX on base a few days before the 4th and purchased all of our food and decorations, I was lucky enough to watch the families who had their loved ones back home from a deployment. The busses rolled in and the signs and flags were waving the wives were crying the kids just wanted to see their dads. It was a Seabee construction battalion back from Iraq, I think I cried buckets that day I was so happy for them, it was priceless.

This holiday to me is about the gathering, celebrating, reflection, fireworks and food. It’s the one day all of us citizens smile a little bigger because our Country puts another candle on her birthday cake this year there are 238. Her present to us is the same ever year and it’s never to be taken for granted, we are given the gift of – freedom. We have 56 men and their signatures on a Declaration to thank for this gift. I also wish to offer this statement, to our Men and Women in uniform…past, present and future God bless you…and thank you for protecting our Independence.

Cheers!

Vanilla Ice Cream

Ingredients
  1. 1 ½ cups whipping cream
  2. 1 cup whole milk
  3. ½ cup half and half
  4. 1 1/3 cup granulated sugar
  5. 4 egg yolks
  6. 1 whole vanilla bean
  7. Pinch of salt
  8. Optional: 1 cup chopped fresh fruit, ½ cup chocolate chips, 2 tablespoon fresh herbs, ½ cup jam or jelly, ½ teaspoon flavoring of your choice.
Instructions
  1. Combine all three milks, sugar, and the pinch of salt in a medium saucepan. Split and scrape the vanilla bean place it in the pot too. Heat over medium-high, stirring occasionally, until the mixture is warmed through, do not boil just tiny little bubbles should form around the pans edge. Remove the pan from the heat.
  2. In a separate bowl, whisk the egg yolks until smooth and pale in color. Slowly pour 1 cup of the warm milk mixture into the bowl with the egg yolks, whisking constantly this will temper the egg yolks so you won’t have scrambled eggs. Return the entire mixture to the saucepan and place over medium heat. Cook, stirring constantly and making sure to scrape the bottom of the pan, until the mixture thickens slightly and coats the back of a spoon (about 170 F). Pour the ice cream base through the mesh strainer into the bowl; place vanilla pod back into the strained base, let the custard cool slightly, then cover and refrigerate until completely chilled (24 hours). Remove the vanilla bean before churning, add optional ingredients if wanted then follow the manufacturing directions of your ice cream maker and enjoy.