easy to make

5 Essential Fresh Herbs

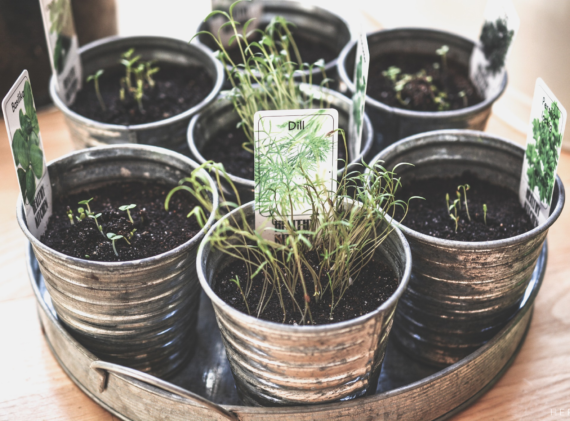
I love to cook with fresh herbs, there is absolutely nothing like a the fresh taste of parsley, chives and butter with a good steak. The addition of mint to a fresh fruit salad or the bright somewhat fennel flavor fresh chopped tarragon adds to chicken salad. At my home I have two herb gardens, one out in my main garden where I grow the bulk of my vegetables and then a smaller raised garden bed out on our porch thats within walking distance to my kitchen.

At this moment, late winter I have at least 8 varieties of herbs growing; parsley, cilantro, chives, mint, tarragon, thyme, oregano and rosemary. I have two varieties of rosemary creeping and tall, three  types of thyme; common, elfin and lemon. Two lovely varieties of oregano; Greek and Italian. Why so many? What uses do I have have for all of those? Do they survive Texas winters or summers? All those answers and more are below and images of the 5 essential herbs I use in my recipes and as garnish in my images.

Basil

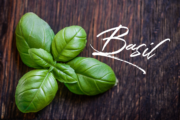
Highly aromatic with a robust licorice flavor. Excellent in pestos, as a finishing touch on pasta sauces and dishes, or stuffed into sandwiches.

Dill

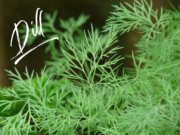
Light and feathery herb with a pungent herb flavor. Use it with yogurt sauces, vinaigrettes, homemade pickles, poached fish, and sprinkles over salad greens.

Parsley

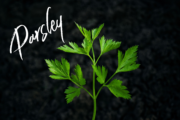
Available in flat-leaf (Italian) or curly varieties, this very popular herb is light and grassy in flavor. Use it in sauces, in salads, in place of cilantro, compound butters and as always a garnish.

Chives

Delicate onion and garlic flavor. Use with fish, baked potatoes, whipped in cream cheese and their flavor is perfect for creamy egg dishes.

Thyme

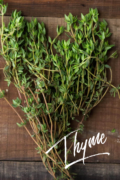
 A subtle, dry aroma anywhere from a lemon flavor to a slightly minty flavor. Best used with poultry, fish, vegetables, soups and is paired with tomatoes.

All Purpose Herb Salt
Save RecipeSave Recipe

Ingredients

  • 2 cups Kosher salt, coarse salt or Himalayan salt
  • 1 Tablespoon parsley, chopped
  • 1 Tablespoon rosemary, chopped
  • 1 Tablespoon Thyme, chopped
  • 1 Tablespoon black pepper, freshly ground
  • 1 lemon juiced and zested

Instructions

  1. Set oven to 250 degrees.
  2. Measure the Kosher salt into a medium size bowl add the fresh ground pepper to the bowl and set aside.
  3. Wash and dry all the fresh herbs, remove only the leaves and discard the woody stems from all the herbs.
  4. With a sharp knife and cutting board, finely chop the herbs and add to the salt.
  5. Wash and dry the lemon, using a zester remove the peel and add the zest to the salt and herbs.
  6. Juice the lemon you just zested, making sure to strain any pulp and seeds. Add the lemon juice to the salt and herbs.
  7. Stir the salt well so the lemon juice, herbs, and zest are fully incorporated. Spread the mixture evenly onto a baking sheet and bake 30-45 minutes or until the salt is no longer wet and looks very dry, stir the salt mixture carefully once or twice through the cooking process.
  8. Remove from the oven and allow to cool, take a fork or wooden spoon and break up the large pieces.
  9. Place in an airtight container for up to 6 months.
  10. Add to chicken, turkey, fish, vegetables, salads and added to unsalted butter to make a compound butter. My personal favorite is to add this salt over freshly popped popcorn and drizzled with a bit of brown butter.
7.8.1.2
2
http://katescuriouskitchen.com/5-essential-fresh-herbs/

Best-Ever Panini Press Sandwiches

I love when it is panini night at our home, the smell of browned butter and toasting bread. That crisp bread crunch and then the soft and silky melted cheese are culinary perfection. From melted Swiss cheese and onions to cheddar and bacon this meal is not only simple but packed full of flavor.

The challenge is to grill the bread correctly and achieve those deep grill marks with out burning, then getting the cheese to melt evenly but still hold its shape. The solution, use good and sturdy artisan bread that has 1/2 inch slices. Choose good cheeses, it is a must, sample as many as you can from your deli then make your selection. Letting your cheese sit out for about 5 to 10 minutes to get the chill off before grilling ensures even melting. Using a panini press that evenly heats the griddle plates is key, you can guarantee a crips texture, golden color and perfectly warm melted cheese filing.

You can find this exact model panini press in my pantry, I love the Cuisinart grill and panini press. The plates heat up quickly and evenly which toasts the bread or what ever you want to press in it. The simple to see green light turns on when your panini is ready, there is no guess work. The griddle plates are nonstick so your clean up time is a breeze, no more burnt on cheese remains. Along the backside there is a drip pan for catching any butter or olive oil run off.

Perfect Side Dishes for A Panini

Roasted tomato soup is the top side dish for any panini. With a creamy and silky texture this soup calls for melted cheddar, jack and cheese sandwich to be dunked then swooped up into your mouth to enjoy all that salty and rich flavors.

Arugula salad with lemon vinaigrette, the peppery flavor from the arugula and the bitter yet salty vinaigrette balance the fattiness of all that cheese. Use the same olive oil to brush over the bread for your the sandwich and in the salad dressing, the flavors marry the ingredients perfectly.

Sweet potato fries with a sprinkling of sea salt are a delicious addition to a warm spice panini grilled cheese sandwich. Think about adding rich Indian flavors such as sliced roasted curry chicken, chutney and gouda cheese.

Tips

If you choose to use a grill pan instead of a panini press, heat the pan on medium-low heat for 10 minutes. Place the buttered grilled cheese sandwich in the pan and reduce heat to low, add a small plate on top of it and a heavy soup can. That weight will press your sandwich perfectly.  Once the bread is golden brown and the cheese is melted remove it, sprinkle some finishing salt and fresh ground black pepper over the top or add some fresh chopped herbs.

Slicing, what is the right way to slice a grilled cheese sandwich? After many tasty tests my family and I have found that slicing the sandwich diagonally is the best way. That long cut releases a bit of the trapped heat and has more surface area to dip into the soup. Letting the panini rest for 3 minutes before slicing helps the melted cheese set up so it does not run onto the plate.

Enjoy the recipes below, try them and let me know how you enjoyed all the incredible layers of flavor. This is a family fun night meal, have the ingredients placed on the counter, the press warmed and dinner plates waiting. Kids LOVE making these, at least mine do, spreading the butter and stacking up the ingredients gives them such confidence. They also love to hold the press handle down and watch the cheese slowly melt and the bread brown. Enjoy one of my top 5 comfort foods, share your pictures over on Instagram with the #katescuriouskitchen

How to Cook A Panini

Pre-heat your panini press, carefully place your sandwich on the hot grill plates. Close down the top part of the press and cook according to the manufactures direction, usually 3-5 minutes. Remove with care, the sandwich will be very hot, wipe down the grill with a folded paper towel.  Place hot sandwich on a plate or cutting board, continue to cook additional panini sandwiches.

Brie, Arugula and Prosciutto Panini: Brush the outside of both pieces of bread with olive oil. Turn over and spread 1-2 tablespoon of sweet hot chutney on the inside of each bread slice. Add very thin slices of brie to each piece of bread. Next, add the prosciutto on top of the cheese, add a bit of baby arugula on top of that. Place the sandwich together and cook the panini as to your grills directions.

Texas Brisket Panini: Spread softened butter to the outside of two thick slices of sourdough bread. Take 1-2 tablespoons of grain mustard or your favorite BBQ sauce and spread on the inside of the bread slices. Add 2 -3 slices of Colby jack or cheddar cheese to each bread slice. Now add your cooked brisket to one side and top with pickles. Place the sandwich together and cook on the panini grill as per the grills instructions.

Chicken Caprese Panini: Split a ciabatta roll in half or slice two pieces of rustic artisan bread. Brush the inside and outside with olive oil. Evenly spread 1 tablespoon of pesto on the inside of the bread. Place two slices of fresh mozzarella on top of the pesto and two thin slices of tomato on top of the cheese. Add some pre cooked rotisserie chicken to one side a  drizzle of balsamic vinegar and carefully place the sandwich together. Cook as per your panini grills directions.

Cheers!

What a Dream…

A Dream Come True.

I have an announcement, something that I have been holding in and protecting for some time now. It started with a dream then it moved over to a wish and then it turned into something real, something I have been able to shape, contour and cultivate for months now. Yesterday morning November 12,2018 it all changed for me, that wish connected me ever so slightly to chef’s and cooks I have looked up to and learned from for years.

Julia Child the Master of French Cooking, Edna Lewis and her soul feeding food, Ina Garten and her flawless simply elegant meals, Ree Drummond and her lifestyle nourishment. Samin Nosrat and her explosion of the four food flavors. Gordon Ramsay and his Military perfection in the kitchen, Rachael Ray and her ease of preparation, Martha Stewart and her determination of home cooking perfection. Bernard Clayton and his layered pastry, Alice Waters and her dedicated seasonal movement, Americas Test Kitchen and their persistence to find the perfect recipe, Rick Bayless and his flavorful pallet of spice. Ruth Reichel and her passion with food, Jack Gilmore and his dedication to the Texas farmer, Steven Raichlen and his ability to tame smoke and fire. All the above names and countless others have one thing in common they are cookbook authors and as of yesterday I joined that list too.  I am a published cook book author!

I give you, The Campground Gourmet, Simple, Delicious Recipes for Dining in the Great Outdoors. Available now on Amazon.


I can not begin to tell you the amount of work that went into this project however, I can tell you about all the amazing and dedicated individuals that have helped me put all the pieces together. Stephanie and Jeremy Puglisi creators of RV Family Travel Atlas, they are my editors, they have spend countless hours editing, creating and guiding me along this adventure. I am truly grateful to the both of you and your belief in me, this cookbook and our friendship, thank you so much.

Steven Dunbar, my love and champion. You have always, always encouraged me to take adventures and just go for it. I can not think of a single time in our 12 years of marriage (13 on Friday 11/16) where you have asked me not to do something, you have never said no. But, I’m certain when I am in the thick of it you wish you had. I love you husband, thank you so much for all your help, encouragement and the strongest shoulder I could ever rest my head on when I was too tired to go any further. Oh, and for cleaning up when that raccoon destroyed my photo set on the patio, you are a saint.

To my children, you were my first true recipe taste testers, I made all your baby food when you could eat solids. I found out by trial and error what all your favorite cookies, meals, smells and tastes are. I have watched all three of you grow up and develop new tastes and favorite food memories. I love when you ask me to make your favorite meals, even if it is a box a macaroni (Paige) or a beurre blanc sauce (Andrew) or a perfect pan seared steak with a fried egg (Sean).

My friends and family who have been in the loop and truly kept my project safe and protected until yesterday when it was out there for everyone to see. Your encouragement, help and cyber cocktail time truly made this experience a magical gift. You helped me choose recipes, look at images and you also told me that when I made it big I owed all of you an Airstream or one heck of a vacation…I love each one of you and I appreciate your loyalty and friendship more than you could ever know.

I have always felt at home or in my comfort place at a campground, sitting in front the fire watching the golden coals smolder and send tiny shooting stars into the sky. The fire at a campground not only warms you up at the end of a long day of hiking or swimming in a lake, it feeds you. You can place a piece of cast iron over the coals and slip a fresh caught trout in that pan with onions, herbs some olive oil and a bit of salt and pepper and you have one of the best over the fire flavor meals anyone can create. It’s the fire, smoke and quiet, the total concentration of keeping the temperature there in just the right zone. It’s the laughter while watching a marshmallow swell with the heat of the fire only to spontaneously catch on fire and smolder away. It’s that crisp morning air and a rich hot cup of coffee in your favorite camp mug- it’s the great outdoors. There is so much my cookbook is about, the recipes are perfect for at home, at a park, sharing with your family at a celebration or sitting in Jackson, Wyoming under the peaks of the Grand Teton and all her beauty.

I’m Kate Dunbar, The Campground Gourmet, I tell stories through food and help individuals create culinary adventures with my recipes.

Kate's Curious Kitchen

Home Made Ice Cream

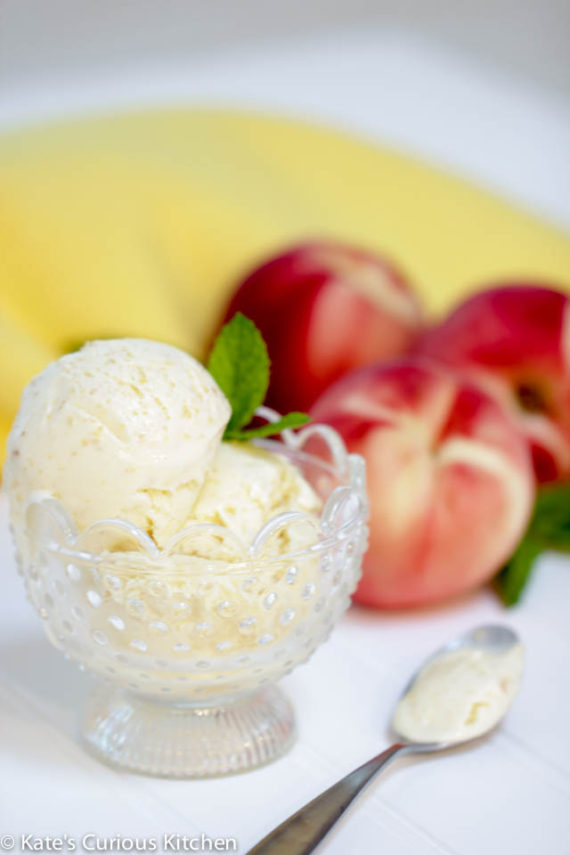
For years I have tried to make ice cream! Now really, how hard can it be? Hard! Either it’s too icy, too fatty or just not flavorful. However on a recent trip to Charleston South Carolina, I asked a pastry chef what was her secret? She said it’s in the milks and then in the bloom time-what is that? Walk me through the process, please. Would you believe it, she did! I learned that the French style (egg yolk based) is the best for ice cream. Half of the problem is the texture; and, that rich, creamy custard base is exactly what achieves the silky feel.

What to choose for the flavor; well, that is a tough pick. I’m a purist I prefer simple ingredients: vanilla beans that are plump and have possibly been sitting in a mason jar filled with Basil Hayden’s Bourbon for say maybe six months. Or, fruit picked at the peak of freshness and flavor. Peaches have just come into season here and they are amazing this year I see pints of peach ice cream in my future.

Now for the ice cream maker, long ago and far away, an old, banged up and battered, well-loved White Mountain hand crank ice cream maker was a staple during summer time. My backside would have frost bite from sitting on top of that machine for what seemed like hours. I’m going to pull a Sophia from Golden Girls moment on you. Picture it Ojai, California summer 1978 I’m three years old and it’s about 100° outside in the shade. My grandfather has just picked up ice and rock salt; my grandmother has just made the ice cream base. Outside on the patio, the ice cream making station was created. The frozen silver canister with its paddle was placed inside the wooden barrel ice cream maker, the ice cream base was added to that canister then the lid was attached and the sides were packed with ice and rock salt. A few folded burlap sacks sat on top of it keep it insulated. My Poppa would then grab a grandchild of his choice_ usually it was me_ and plop me on top of those burlap sack. Why you ask? Because my backside was small enough to sit on top of those burlap sacks on top of the ice cream maker holding the ice and salt in place. Poppa churned the ice cream until it was thick and frozen to perfection. When he was finished he, would throw me in the pool so my backside would warm up. Good times!

It was worth it! His vanilla ice cream tasted like nothing I have ever had. Unto this day I have still been trying to get it just right. So with the tricks of the different milks and the tip of bloom time (see recipe) I was given in Charleston by that pastry chef I came home and bought a Cuisinart ice cream maker and got to work. I came up with a recipe that used three different milk types: whole, half-and-half and whipping cream. It’s that balance it creates folds cream not milk crystals.

I hope you enjoy this recipe and please let me know how it works for you. I just visited the White Mountain ice cream maker website_ I’m thinking of getting one, I have twins their backsides are small just perfect for sitting on top of the ice cream maker! I could make a lot of ice cream this summer.

Cheers!

 Real French Vanilla Ice Cream

1 ½ cups whipping cream

1 cup whole milk

½ cup half and half

1 1/3 cup granulated sugar

4 egg yolks

1 whole vanilla bean

Pinch of salt

Optional: 1 cup chopped fresh fruit, ½ cup chocolate chips, 2 tablespoon fresh herbs, ½ cup jam or jelly, ½ teaspoon flavoring of your choice.

Directions:

Combine all three milks, sugar, and the pinch of salt in a medium saucepan.  Split and scrape the vanilla bean place it in the pot too.  Heat over medium-high, stirring occasionally, until the mixture is warmed through, do not boil just tiny little bubbles should form around the pans edge.  Remove the pan from the heat.

In a separate bowl, whisk the egg yolks until smooth and pale in color.  Slowly pour 1 cup of the warm milk mixture into the bowl with the egg yolks, whisking constantly this will temper the egg yolks so you won’t have scrambled eggs.  Return the entire mixture to the saucepan and place over medium heat.  Cook, stirring constantly and making sure to scrape the bottom of the pan, until the mixture thickens slightly and coats the back of a spoon (about 170 F).  Pour the ice cream base through the mesh strainer into the bowl; place vanilla pod back into the strained base, let the custard cool slightly, then cover and refrigerate until completely chilled (24 hours). Remove the vanilla bean before churning, add optional ingredients if wanted then follow the manufacturing directions of your ice cream maker and enjoy.


Helen’s Chocolate Cake

Helen’s Chocolate Cake

Helen's Chocolate Cake
Helen’s Chocolate Cake

Every family member, friend, chef or baker has a go to dessert recipe; a tried and true treat they can make it with their eyes closed. My Mom, Helen, discovered this chocolate cake recipe over 30 years ago in a magazine though she can’t remember the publication, possibly Sunset, Woman’s World or maybe even Gourmet she took the base ingredients and changed them to her liking. This cake has a history steeped in secrecy, adoration, gratitude, and appreciation and above all else my mother’s love. Proudly positioned in her faded yellow recipe card box sits a splattered and stained and quite faded card with the title “The Chocolate Cake” written across the top.

Over the 39 years of my life this delightful cake has made appearances at Christmases adorned with a miniature children’s carousel for birthdays it was always decorated with three candles representing the past, the present and future. It’s been featured at Graduation celebrations with a perfect icing scroll or waiting with small American flags atop for my son’s return home from his BCT (Basic Combat Training) with the U.S. Army. The cake has celebrated beginnings such as the family meal as we wished my son good luck and Godspeed to his Army post in Korea, and endings being brought to share after the passing of a loved one.

This cake with its tall and sturdy yet tender layers is perfectly complimented by a rich and feather light chocolate icing and all of this time the recipe has remained the World Champion of my family’s culinary secrets. No family member has ever had it, many have asked. Mom’s reply has always been the same “I found this gem. Go and find yours, then let’s compare.” She delivers her response in the tone of a treasure hunter. She found her own personal “X marks the spot” and she encourages others to find their own as well, not to take hers. I completely understood so I knew there was never going to be a chance in all holy heck that I would ever get my hands on that cake recipe.

When I opened my bakery and café, I received a priceless gift. It was a fresh recipe card, void of batter splatter and cocoa dust. My Mom’s handwriting revealed the few ingredients, oven temperature and the steps to follow to make The Chocolate Cake. This was truly one of the simplest recipes I had ever seen and one of the most loving gifts I had ever received. Now it was mine (head tilted back cackling away calling out, “Mine, mine, mine!”) I now had the ability to share a bit of my mom with my customers and reveled as they devoured her chocolate cake!

You are joining me on my new adventure, you are now on my maiden voyage as a food writer, recipe developer, food photographer, published recipe author and above else a storyteller. In good faith and in celebration of my Mom I asked if I could share her recipe with all of you. Could I please reveal the ultra secret, long ago and far away magazine find my mother has carried with her and the memories of my family members, friends, ex-boyfriends (sorry husband) and former customers? Mom said I was allowed to publish this saying, “ Show them that you care that you will go to all lengths to uncover stories, recipes and memories, help them create an amazing cake that wows everyone.”

Enjoy this cake. Serve it with three things, laughs, people and stories. Or take it up a notch and wash it down with merlot, coffee or cold milk. Thank you for being here, thank you for taking this curious adventure with me. I cannot wait to see where we are headed next!

Oh, here is a side note, when I received that recipe card the first time my exact statement was this “ Mom! What in the hell? This cake is vegan? I’ve been eating a vegan cake all my life? My Mom’s statement “What’s a vegan?” I love you Mom.

Cheers!

 Helen’s Chocolate Cake

What you will need:

2- 9” round cake pans buttered or non-stick sprayed, parchment lined and cocoa dusted. Oven preheated to 350.

Ingredients

2 tbsp. instant coffee

3 cups all purpose flour sifted

2 cups granulated sugar

1 cup sifted Hershey’s cocoa powder

2 tsp. baking soda

1 tsp. kosher salt

1 cup oil canola, vegetable, safflower (do NOT use olive oil or coconut oil)

2 cups room temperature water

1 tbsp. vanilla extract

4 tbsp. Heinz white vinegar


In a large bowl sift the flour then sift the cocoa powder, granulated sugar, baking soda, instant coffee and salt. Mix well with a whisk and set aside.

In a medium size bowl measure out oil, water and vanilla, in a separate smaller bowl measure out the white vinegar and set aside.

Add the oil, water and vanilla into the dry ingredients; mix well with your whisk until no dry ingredients remain. Once the batter is smooth add the vinegar and mix to incorporate. Pour evenly into the two prepared pans and place in your hot oven. Bake for 30 to 40 minutes, testing the center of the cake for doneness with a wooden skewer. The skewer should have very little crumb clinging to it. Remover the cake pans and place on a cooling rack for 10 minutes. Turn over cake pans on cooling racks and let sit for 10 more minutes, remove the pans and carefully peal away the parchment paper, allow to cool completely.

Wrap cake in waxed paper, parchment or plastic wrap with a 2-4 vent hole pricks in the plastic wrap (the cake needs to breath) and leave out room temperature over night. In the morning make the icing and assemble your chocolate cake.

Light and Creamy Chocolate Icing

1 cup sifted cocoa powder

4 cups sifted powder sugar

1 ½ cups softened unsalted butter or butter flavored shortening

2 tsp. vanilla extract

4 tbsp. milk, half & half, whipping cream or thick coconut milk

1 tsp. kosher salt

In a mixer with a paddle attachment mix butter or shortening on medium speed for 5 minutes, stop and scrape down the sides of the bowl and add the vanilla and salt mix for an additional minute. Scrape the bowl down, add your sifted cocoa powder, mix on low speed for one minute then increase speed to medium high for 2 minutes. Scrape bowl down and add your sifted powder sugar, mix on low speed for 2 minutes see if the icing looks dry if it does add 1 tablespoon at a time milk, half & half, whipping cream or thick coconut milk mixing for 1 minute after each liquid addition. When it looks moist increase speed to medium and mix for five minutes stopping at the 3-minute mark to scrape down the bowl and continue. Ice your cooled cake and enjoy.